Looking for an easy DIY for Christmas? Add your own unique touch to the tree this year with this tutorial on how to decoupage Christmas napkins into stunning ornaments.
Here’s the short answer: to decoupage Christmas napkins onto an ornament, peel the white layers off the back of a paper napkin, cut the printed top layer into strips and leaf shapes, and press them gently onto a plastic ball ornament brushed with ModPodge. Then paint the topper and add a velvet ribbon bow.

When I was growing up my tree was covered in handmade ornaments.
I am not talking about the ones your kids made in first grade.
It was amazing what people used to make!
And I still remember the hand-written dates on the bottoms of them in the gifter’s handwriting.
That was really special and now they are considered vintage.
Even though the ornaments that are available in all the stores now are really pretty, there is just something about handmade ornaments that make the tree look a little less commercial and a lot more personal.
One of the simplest ways to make a handmade ornament is to decoupage Christmas napkins onto an existing ball ornament.
What I love about this is that you can make them look totally custom to your colors by choosing napkins that you love and little special embellishments like velvet ribbon.
Let me show you how to create this in a few simple steps.
- Time: about an afternoon
- Skill level: easy
- Ornaments: plastic ball ornaments (I got mine at Michael’s) or old ornaments you no longer like
- Napkins: Christmas napkins (I picked mine up at Home Goods)
- Finishing touches: bronze craft paint on the topper and thin green velvet ribbon
Why Decoupage Christmas Napkins Work So Well
Using napkins for your ModgePodge project is one of the best and easiest ways to customize your creation! Why? Let me tell you a few reasons.
- Thin and Seamless: This is probably the biggest perk! Paper napkins are incredibly thin, which means they practically melt into your surface when you apply them. You get this lovely, almost painted-on look, and the edges disappear, creating a truly seamless finish. This is much harder to achieve with thicker papers.
- Beautiful Patterns and Designs: The variety of patterns out there for paper napkins is just incredible! From delicate florals to bold geometrics, and everything in between, you can find designs to match any style or theme you’re going for. It is really easy to create that handmade look!
- Cost-Effective: Let’s be real, crafting can sometimes get a little pricey, right? But paper napkins are usually super affordable. You can pick up a pack for a couple of dollars and get a ton of designs to play with. This makes them perfect for experimenting and for larger projects where you need a lot of material.
- Easy to Work With (Mostly!): Because they’re so thin, they’re pretty forgiving. While they can tear if you’re not gentle, they also conform really well to curved surfaces, which is a huge bonus when you’re decoupaging things like ornaments.
- Layering Opportunities: Their thinness also means you can often layer them for different effects. You might use one pattern as a base and then add smaller cut-outs from another napkin on top to create depth and interest.
- No Wrinkling (with the right technique!): With a bit of practice you can get a super smooth, wrinkle-free finish with napkins. The key is often to remove the back plies (most napkins have 2-3 layers, and you only want the top printed one!) and to apply your medium carefully. You can peel these back easily!
A Little Tip for Success: When you’re using paper napkins, remember to carefully separate the printed top ply from the plain white plies underneath. You’ll only want to use that top, colorful layer for your decoupage project. This is what makes them so beautifully sheer and easy to work with!
Supplies You Need for Napkin Ornaments
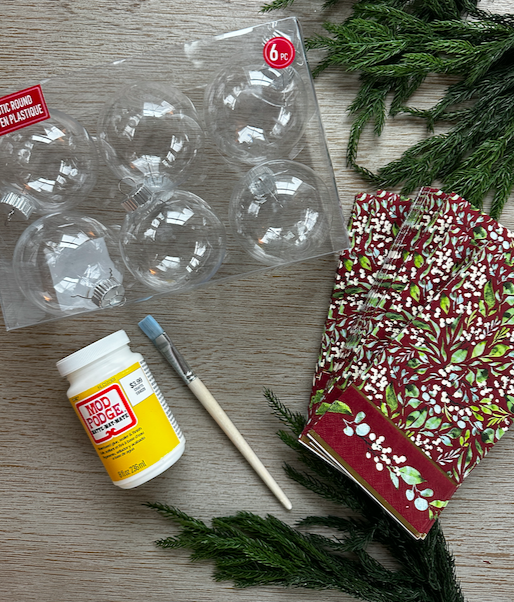
- Plastic ball ornaments (I got mine at Michael’s) or old ornaments you no longer like. Just keep in mind that the color of the ball will show through the napkins.
- Scissors
- Thin green velvet ribbon
- Gold or bronze craft paint
- Foam brush or small flat artists brush
- Christmas napkins (I picked mine up at Home Goods)
- ModPodge (You can buy it here)
- Paper plate
- Hot glue gun and glue sticks (I use this one)
How to Decoupage Christmas Napkins onto Ornaments
Before you begin, I just want you to know that the less fussing with the napkin once you place it on the glue the better. If you keep going over it with your brush or fingers the design with just start to life right off.
You can smooth it down carefully and meticulously but not for too long.
- Take a plastic ball ornament and remove the topper.
- Measure around the ball from one side of the opening to the other side of the opening and cut two strips of napkin to that length x 1″ wide.
- Then cut 4 “leaf” shapes.
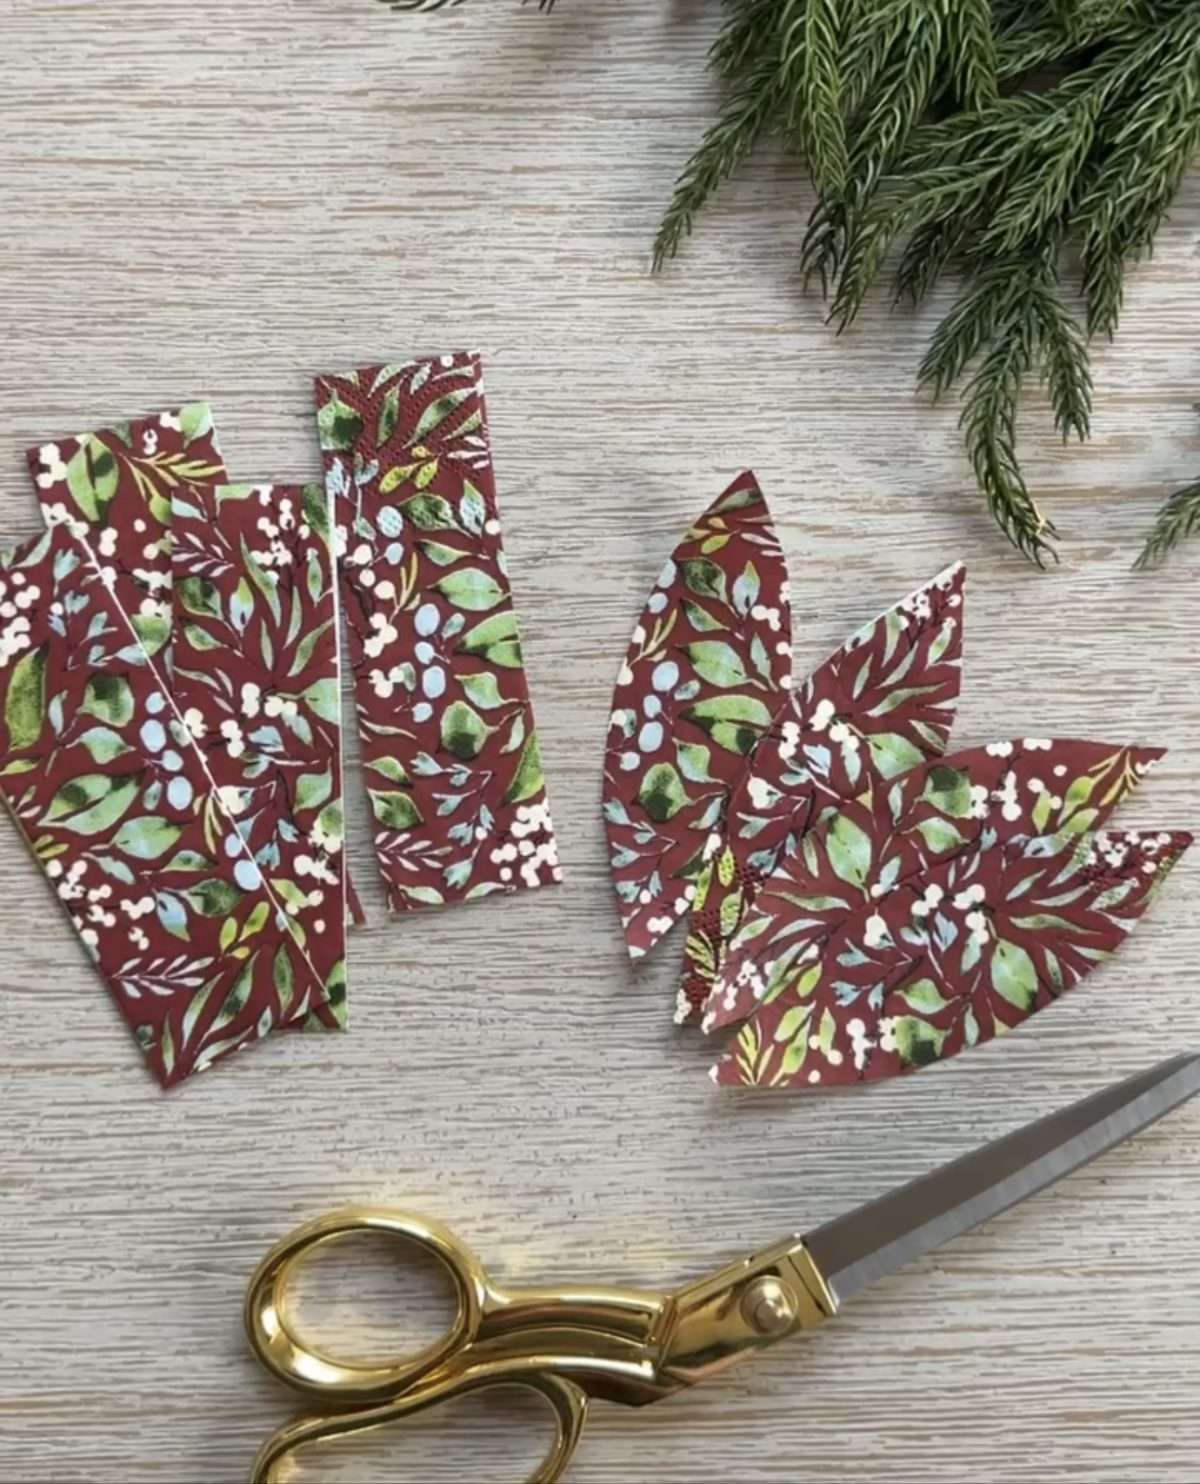
- Separate and remove all of the white layers of napkin on the back side of the strips and leaf shapes. There will be two layers.
- Take the first strip and cut a notch out of each end to fit around the opening of the ball.
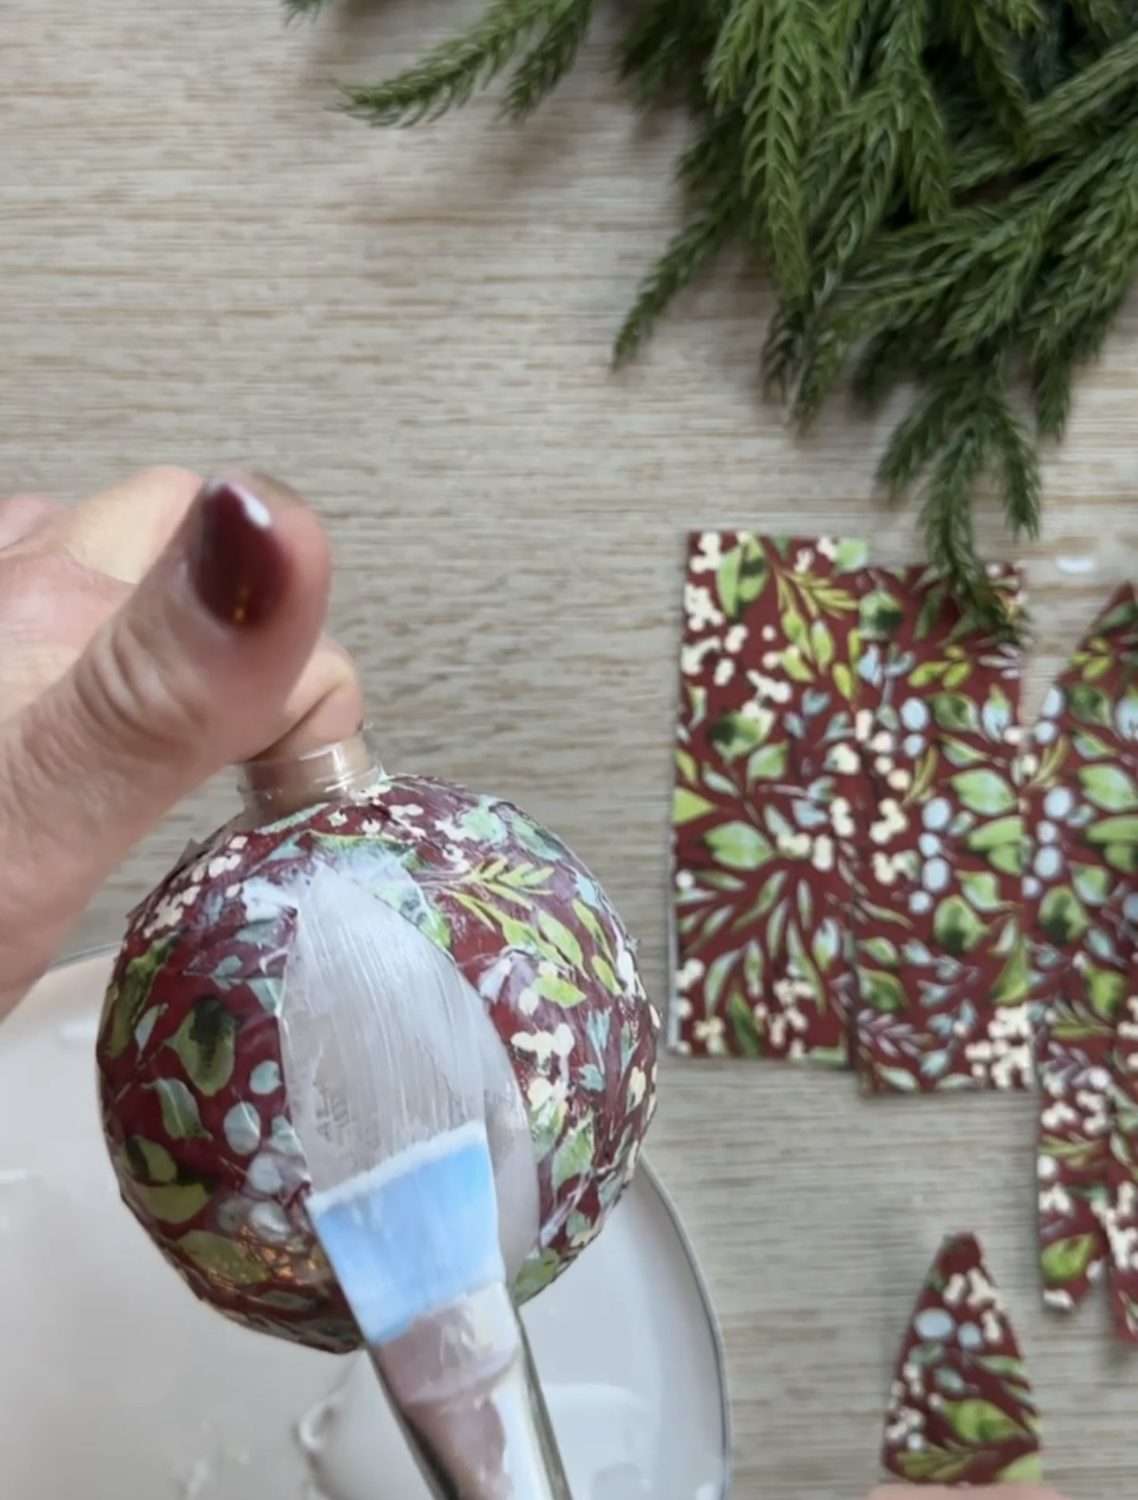
- Add a little ModPodge to the paper plate and then add it to to the ball with the foam or artist’s brush and add one end of a strip of napkin.
- Be gentle as you work with the napkin. Once it gets wet with the ModgePodge it can tear easily.
- Keep adding the ModPodge and laying the napkin on it until you have reached the other side of the ball.

- Repeat with the other napkin strip on the opposite side of the ornament. Your strips will look like an “X”.
- You will have 4 “leaf” shapes of exposed plastic ball. Now add some ModPodge to one section and lay one of the leaf shapes that you cut out over the ModPodge.
- Continue with the rest of the leaf-shaped sections. If you didn’t cut the leaves big enough, just cute a couple more to fill in. Make note of the size you need for your next leaves.
- Add the topper back onto the ornament and paint it with bronze craft paint with a small artist’s brush. Let dry.
- Add green velvet ribbon to the topper and secure it with hot glue.
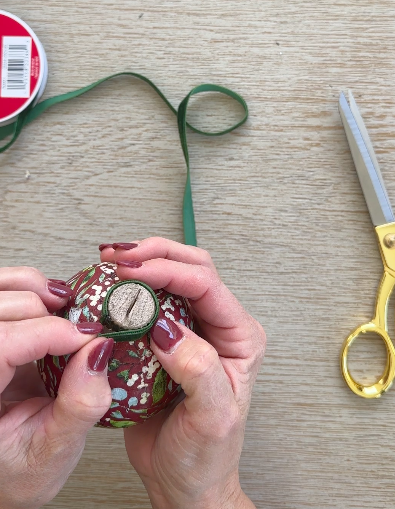 Make a bow out of the ribbon and hot glue it to the top of the ornament.
I love the way these turned out! They are so pretty and look great on my tree.
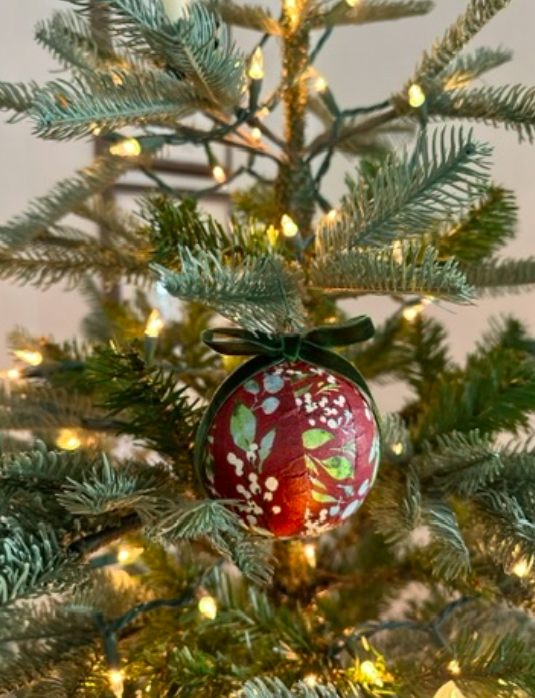
It is a really easy craft that I was able to do in an afternoon. I just made myself a cup of coffee and turned on some Christmas music.
You could make a set of these and wrap them individually in tissue paper and give them as gifts. That would be really special. For wrapping tips, my holiday gift wrapping essentials guide makes it easy.
Try tying them to your gifts for family and friends so they each have one. Want another homemade touch for your gifts? Try these DIY air dry clay name tags.
Or you could place them in a decorative bowl.
I hope this decoupage Christmas napkins tutorial inspires you to bring back some of that handmade charm to the Christmas tree.
Frequently Asked Questions
Can you decoupage with regular napkins?
Yes, you can decoupage Christmas napkins and other paper napkins, and they are one of the easiest ways to customize a project. Most napkins have two or three layers, so peel off the white layers on the back and only use the thin printed top layer. It practically melts into the surface for a seamless, almost painted-on look.
What are some creative decoupage ideas using napkins?
Start by choosing napkins in colors you love, then add small embellishments like velvet ribbon to make the ornament look custom. You can also layer smaller cut-outs from a second napkin pattern on top of a base pattern for extra depth, or cut your napkin into strips and leaf shapes like I did on these ornaments.
What are some good decoupage ideas for Christmas?
Napkin decoupage ornaments are one of the simplest ways to make a handmade ornament, and they make the tree look less commercial and more personal. Wrap a set individually in tissue paper to give as gifts, tie one to each gift for family and friends, or display them in a decorative bowl.
Looking for other handmade ornaments? Try these Nutcracker ornaments with FREE Printable!
You might also like my grapevine garland hack for fall and winter decorating.
And check out my other holiday content. You might just find some more inspiration for your holidays!
Remember, you can do it yourself, but let’s do it together!

Disclosure: This post may contain affiliate links, meaning I get a (very) small commission if you decide to make a purchase through my links, at no cost to you. As a Lowe’s Partner I earn from qualifying purchases. Thank you for your support!
Leave a Reply