Easy tutorial for turning humble grapevine wreaths into a massive, gorgeous grapevine garland for Fall and Winter. Get more for your money with this genius hack!
Dreaming of that lush, overflowing grapevine garland draped across your porch or mantel this Fall and Winter?
Me too! And today I’m sharing my absolute favorite money-saving, jaw-dropping hack to get that gorgeous, high-end look without breaking the bank!
Look at this! Can you believe this stunning garland started as a few humble grapevine wreaths?
Here’s the short answer: to make a DIY grapevine garland, soak your grapevine wreaths in water for 24 hours, then unwind each one by hand into long, twisted strands of vine. Four wreaths (two 18″ and two 10″) unravel into several feet of full, natural garland for about $20, a fraction of what a store-bought grapevine garland costs.
Every year, I love to decorate my porch for the different seasons.
Sometimes I repeat the decor from the previous year, and other times I come up with something entirely new.
And most of the time, I like to repurpose what I already have and breathe new life into it.
This year, I wanted to do something new and use grapevine in my porch decor.
But I really wanted a garland that was massive and full, which is kind of hard to find.
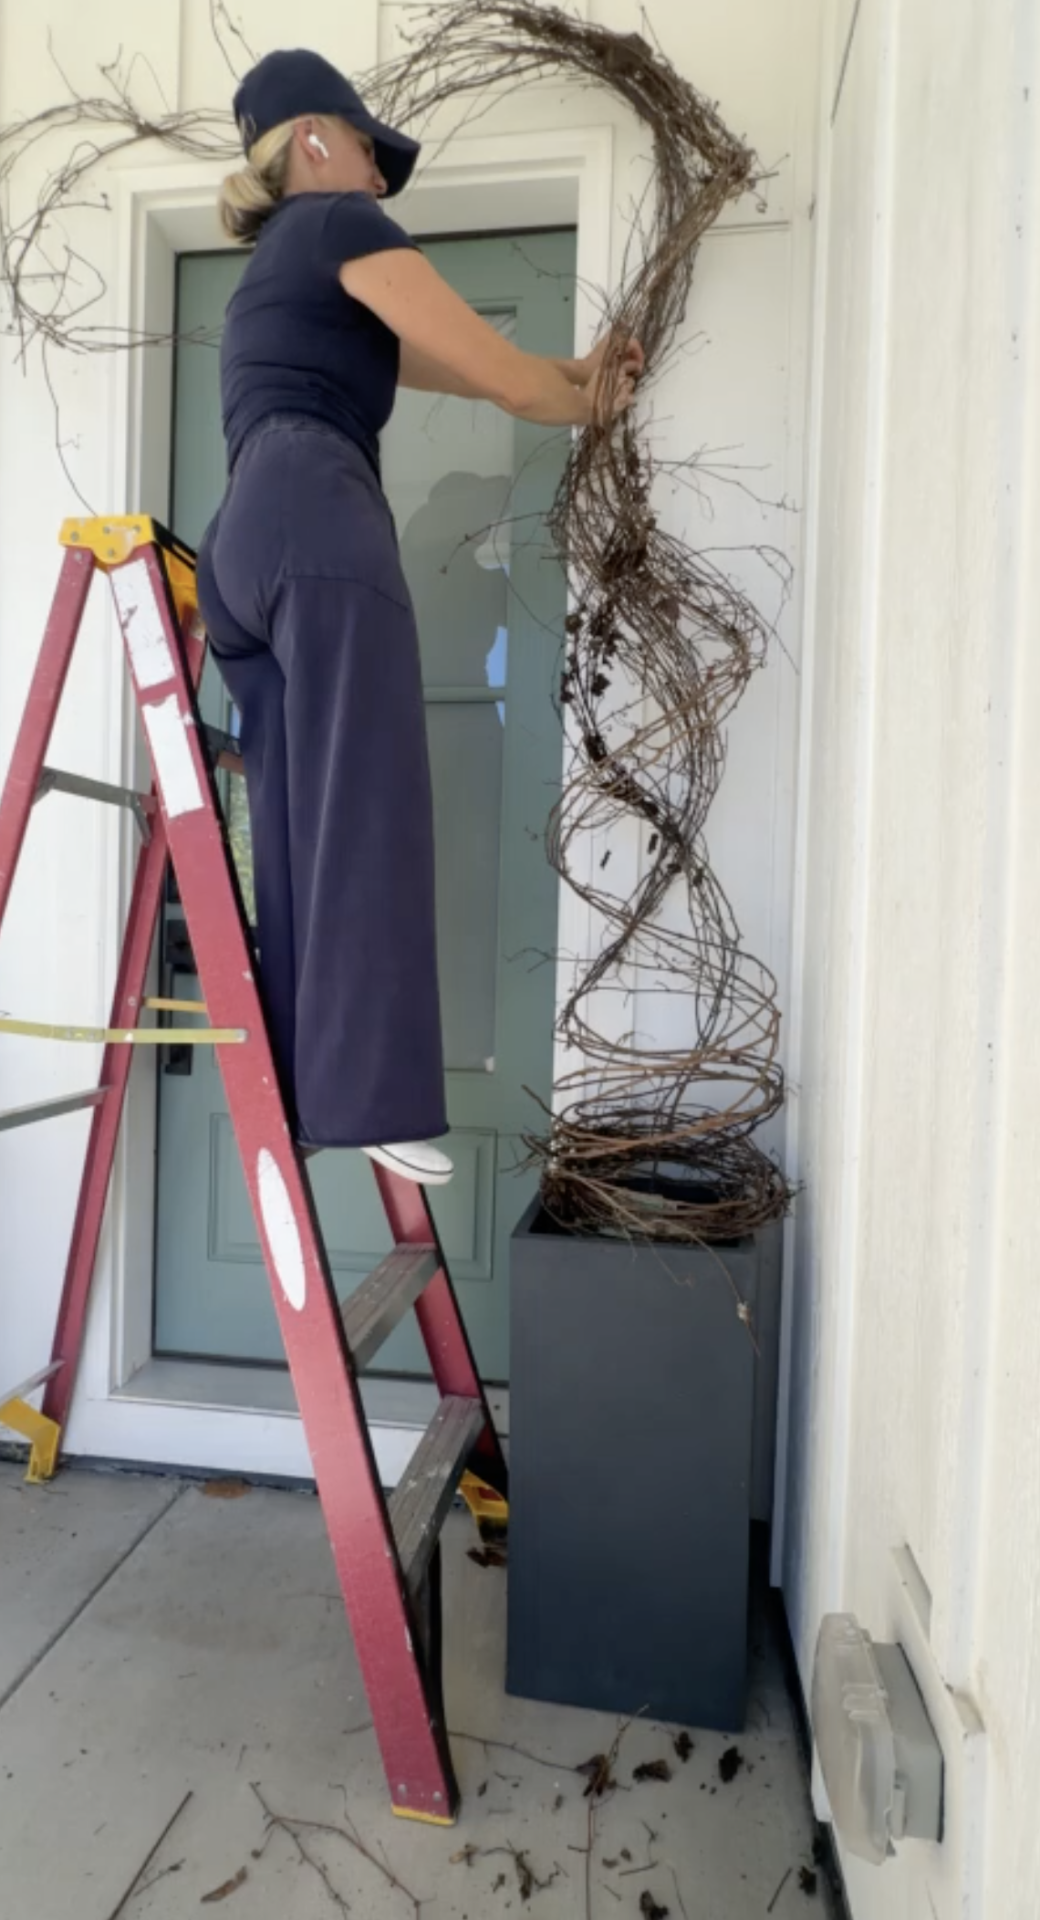
My idea was to have it come up out of my planters and over my front door, but I would have had to buy a lot of vines to achieve the look I wanted.
So I went into my Fall stash in the basement and saw 4 grapevine wreaths from Hobby Lobby just sitting there. Two bigger at 18″ and two smaller at 10″.

I hadn’t actually used them in any decor in 10 years, and when I saw them, I was wondering if they could become my grapevine garland.
You know, full and pretty, and a garland that didn’t cost too much.
My wreaths were bought at Hobby Lobby and were around $5 each. So, even though this was “free” for me, it should be around $20 if you’re buying these and doing this craft.
Since I hadn’t used them in years, I didn’t really care if my idea would work out, so I just tried it and, spoiler alert, I LOVE the way they turned out!
If you go to Hobby Lobby and want to get the wreaths on sale, don’t wait. They are a staple craft and are never on sale, so just go ahead and buy them.
What are grapevine wreaths typically used for?
The wreaths are in every craft store around and are an affordable decor item. There are different kinds of wreaths, so you want to be sure to get something like this wreath and not this wreath for this craft.
Grapevine wreaths are typically used as an earthy or rustic base for crafts and decor.
People add twinkle lights, ornaments, dried florals, etc.
Mine were used as a base for my Fall pumpkins about 10 years ago. I added some cute little berry twigs and burlap to them and then stacked them with my rustic pumpkins.

If you are looking for a faux pumpkin painting craft, and want them to look like heirloom pumpkins, check out how I turned these pumpkins in this photo into pretty faux heirloom pumpkins.
Why make this DIY grapevine garland decor DIY when you can buy it?
- Uniqueness: This garland will be truly unique to you.
- Cost: Although it would be easy to just buy this grapevine garland, this DIY will save you a ton of money.
- Customization: You can make it exactly the length and fullness you want.
- Satisfaction: The pride of a DIY well done!
Supplies needed to make your grapevine garland
- Grapevine wreaths. I have two 18″ wreaths and two 10″ wreaths, but this will work with any size wreath.
- Wire cutters
- Large bin or tub. I suggest a bin because then you can simply dump it outside.
- A sheet or large towel to work on (because it is SO messy)
- Gloves (optional)


How to repurpose your grapevine wreath into garland
This is a very messy craft, so be sure to put down towels or a sheet on your work surface.
I had twigs and dried leaves all over the kitchen counter and floor.
The wreath is created with lots of long twigs that you will need to unravel.
If you don’t soak them and try to unravel them, your twigs will just break.
Step 1. Fill your tub or bin with water.
Step 2. Add the wreaths to the water and let them soak for 24 hours.

Step 3. Take one wreath out of the water and lay it onto the towel on your work surface. You may want to work on one at a time and leave the other wreaths soaking so they don’t dry out.
Step 4. There is a long twig that is wrapped around the wreath to hold it together. Use your wire cutters to cut the little wire ring(s) that hold the long twig on.
Step 5. Unwind the long twig and set it aside.

Step 6. Find the end of your cluster of twigs that make up the wreath, and start to gently unwind them. You will need to be very gentle. Don’t worry if smaller twigs fall off. You will have small twigs and dried leaves all over your work surface and the floor.
Step 7. Keep unwinding until it is all pulled apart. You will be left with a long garland of grapevine that is twisted (kind of looks like a tornado). Set aside.

Step 8. Proceed to do steps 3-7 until all of your wreaths are unraveled.
Because it has been sitting in water, the grapevine will be very pliable and won’t break easily. Just be gentle with it.
Once you have all of your grapevine wreaths unraveled, you can start to add them to your decor.
They are really easy to work with!
They won’t dry out too fast, so you don’t need to rush.
Once they dry out, though, they will become more brittle.
They look so cool and perfect for Fall because of all the dried leaves naturally on them.
What if something goes wrong?
- “My twigs are breaking!” If you find your twigs are still a bit stiff even after soaking, don’t fret! Just pop them back in the water for another few hours. Sometimes those older, dried-out wreaths need a little extra TLC.
- Drying Time: Once unraveled, the grapevine will stay pliable for quite a while, giving you plenty of time to work with it. But remember, as it dries, it will become a bit more brittle, so get your decorating done while it’s still flexible!
- Storage: I suggest hanging it in your garage or storage room on the wall. Trying to put it into a bin might break it!
- Extra, unused garland: You can gently coil it up while it is still pliable and store it for next year! Just be sure it’s completely dry to prevent mildew before storing it.
What to do with grapevine garland?
I used my grapevine garland to come up out of my planters for my Fall decor.
I think it looks SO cool!!
Once Fall is over, I will leave this right where it is and transition this garland into Winter decor.
I will add my little pine trees in the planters and add some twinkle lights up into the grapevine!
Some other things you can grapevine garland for?
- Mantle decor
- Winter garland
- Fall Porch decor
- Winter Porch decor
- Decorate around an entryway door
- Over a mirror
- Smaller wreaths can be unraveled and turned into a centerpiece
- Wedding decor
- Arch decor
- Tablerunner
- Entry table decor
The list goes on, but these are a few ideas.
Frequently Asked Questions
How do you use grapevine garland?
You can use grapevine garland just about anywhere you want an earthy, rustic touch. Drape it along a porch railing or over a front door, wind it up a stair rail or mantel, or tuck it into planters so it spills over the edge. Add twinkle lights, faux florals, or ribbon to dress it up for any season.
How do you make grapevine garland from a wreath?
To make grapevine garland from a wreath, soak the wreath in water for 24 hours to make the twigs pliable, then cut away the small wire that holds it in its circular shape. Gently unwind the twigs by hand until the wreath opens into one long, twisted strand of grapevine, then repeat with as many wreaths as you need for your desired length.
How do you unwind a grapevine wreath?
Yes, you can unwind a grapevine wreath by hand once it has soaked in water for several hours, which keeps the twigs flexible instead of snapping. Find the loose end of the twig cluster and slowly work it apart, expecting some smaller twigs and dried leaves to fall off along the way.
How do you attach flowers or lights to grapevine garland?
You can attach flowers, greenery, or twinkle lights to grapevine garland simply by tucking their stems or wires into the natural gaps in the twisted vine. For anything heavier, a few small pieces of floral wire wrapped around the base will hold blooms or lights securely in place.
How do you store grapevine garland?
The best way to store grapevine garland is to hang it in a garage or storage room rather than cramming it into a bin, which can snap the dried twigs. If you need to coil it for storage, do it while the garland is still pliable and completely dry to avoid mildew.
Wait until you see my full Fall porch decor…this was just a sneak peek. I kept it classy, and it is just enough. Subscribe so you get the post sent directly to your inbox when I reveal it.
I hope you found inspiration here and want to try this or something like it.
Share your photos!! I would love to see what you create, so send photos to my email or tag me on IG @aprilcolleenhome!
Remember, you can do it yourself, but let’s do it together!

Disclosure: This post may contain affiliate links, meaning I get a (very) small commission if you decide to make a purchase through my links, at no cost to you. As a Lowe’s Partner I earn from qualifying purchases. Thank you for your support!
Love it. Have used this before when i had my shop. We now have a wedding venue.
I am sure it was so beautiful, Peggy!