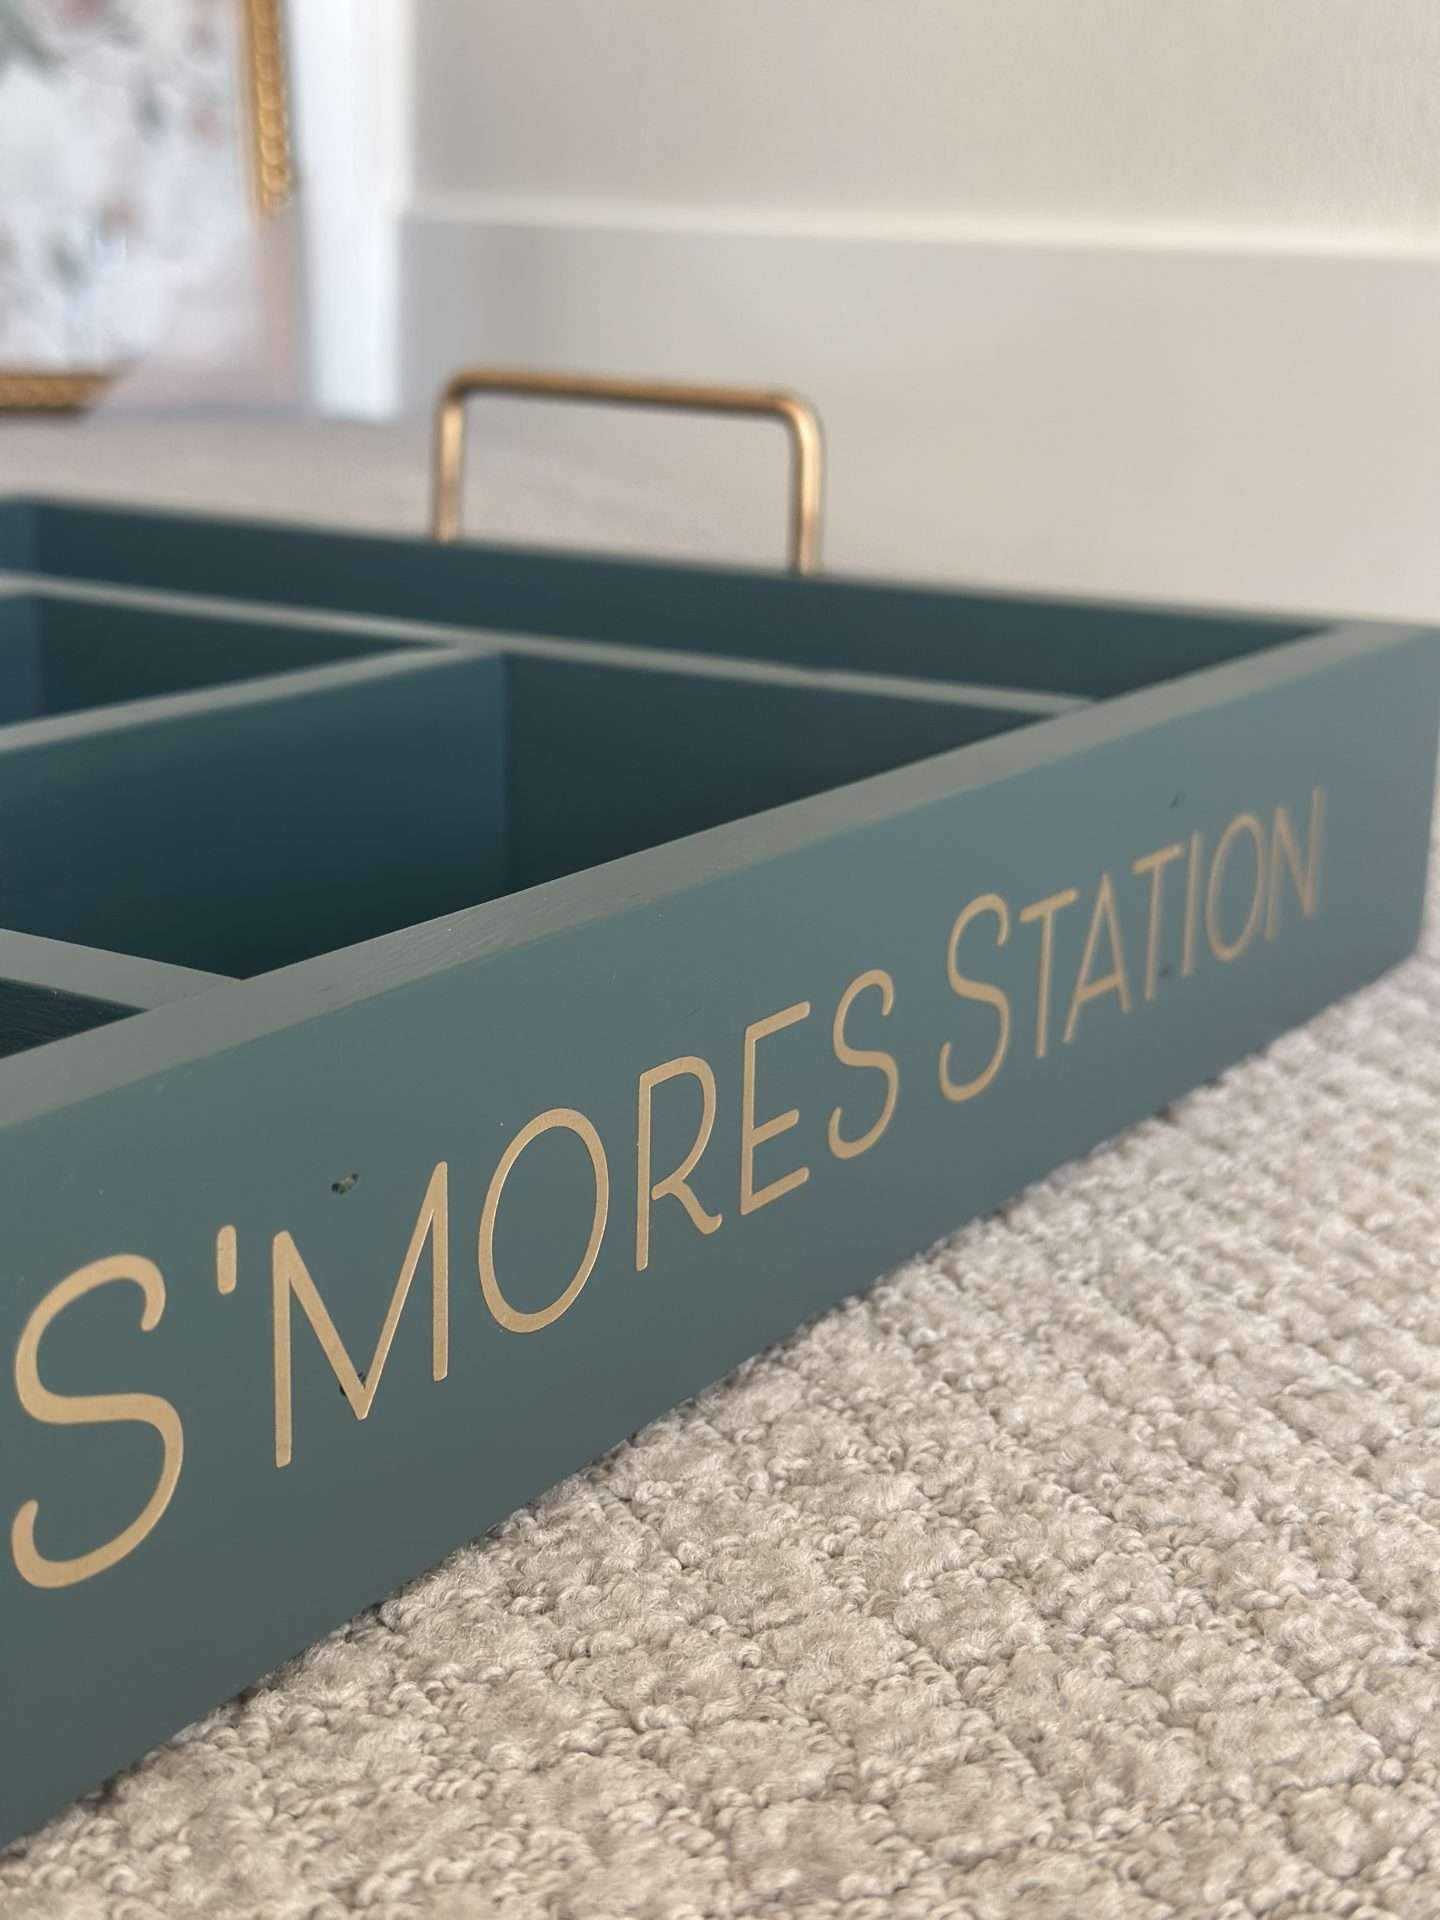
Serve s’mores in style! Showing you how to make a personalized serving tray for s’mores in a weekend that you, your friends, and your family will all love!
Whenever possible, I love to create a unique and personal gift that someone will cherish and know that it came from my heart.
I thought long and hard about what their family liked to do and what I could give them that they don’t already have and wouldn’t really think to get for themselves.
They love making s’mores as a family, but they are always juggling all the things as they make their way to the fire pit with kids in tow.
I came up with this darling personalized serving tray that is totally customizable, and set out to make a plan for the project and gather all of the supplies.
What I love about this project is that it can be any color with any color script and say anything you want it to say.
Best Ready-Made S’mores Serving Trays (No DIY Required)
I whipped this out on December 14 last year. I can’t believe I cut it so close to Christmas, but the weather was so beautiful that day and it felt good to be outside.
I remember going to Hobby Lobby 10 days before Christmas, and it was eerily empty.
I found it SO weird for a craft store to be that empty on a Saturday before Christmas.
If you aren’t interested in making a tray of your own that is personalized, but want to gift one, here are 5 options I found for you all under $30!
1. This brown wooden tray that comes with skewers
2. This black wood tray Making S’more Memories. Also comes with skewers.
3. This “S’mores Station” box.
4. This cute white farmhouse style s’mores box.
5. This smores serving box with fancy handles.
Materials Needed to make a Personalized Serving Tray
Here is a list of my FAVORITE tools on Amazon!
This project can be done in a weekend, (mostly due to paint or glue drying time) and costs about $30.
If you don’t have the tools I used for this project, keep reading and I will offer some alternatives.
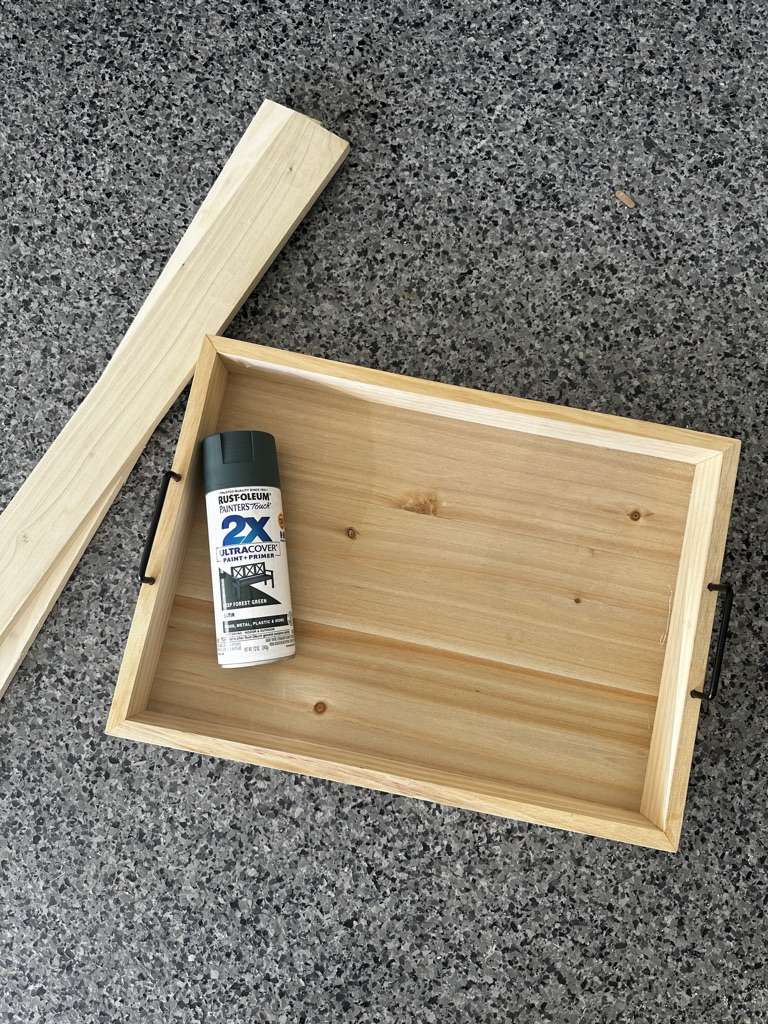
- Wooden tray (I got mine 50% off at Hobby Lobby in the unfinished wood section)
- Miter saw
- Table Saw
- Hammer and small nails or Pin nailer (optional)
- 2 Clamps
- Wood glue
- Wood filler
- 220 sandpaper or sanding block
- Craft wood 1/2″ x 2″ (found in the lumber section at Lowes). These will be the section dividers.
- Spray paint in the color of your choice (I chose a deep green)
- Poly spray paint to seal it all. I used what I had on had which was a Minwax Polycrylic in Satin. If you do a gloss paint everything will be really glossy!
- Gold foil sticker paper for your cutting machine (or these gold foil letter stickers). You can buy single sheets of foil paper at Hobby Lobby so you don’t have to buy a whole roll!
- A cutting machine like a Cricut (but not necessary if you don’t have one). This is mine.
- Rub n Buff in THIS color
- These S’mores skewer sticks
- Large marshmallows
- Peanut butter cups
- Graham crackers
- Hershey’s chocolate bars
Can this personalized tray be made without big tools?
YES!!
If you don’t have the large power tools mentioned in the supplies, don’t worry. You can still do this without all that!
Lowe’s will cut your long pieces to the length that you need. Take your dimensions with you and then just ask someone in the lumber section to cut them for you.
Or you can opt to use a miter box like this one.
You won’t be able to cut the width of the pieces of wood at Lowe’s. Unfortunately, they don’t do that. They only cut the length of a board.
But, you could use a jigsaw to cut the width you need by clamping the long piece to a table and cutting the edge off that you don’t need.
You can use wood glue with clamps instead of a pin nailer to add the pieces to the tray. Just add glue to the ends of your pieces and clamp into place overnight.

How to Make Your Personalized S’mores Serving Tray: Step-by-Step
I saw this wooden tray already assembled and unfinished at Hobby Lobby. It was half off, so it cost me $10.
The size was perfect, and I also liked that it already had handles attached to it.
I was going to buy all the supplies and build the tray myself, but it would have cost me more than $10 to make it so this was a great find!
Of course, if you have specific dimensions that you would like your tray or have materials on hand, you may want to just build a tray yourself.
Let’s get into it!
Measuring & Cutting Your DIY S’mores Tray
1. Place your bag of marshmallows and s’mores roasting sticks in the tray and figure out where to place your first two dividers.
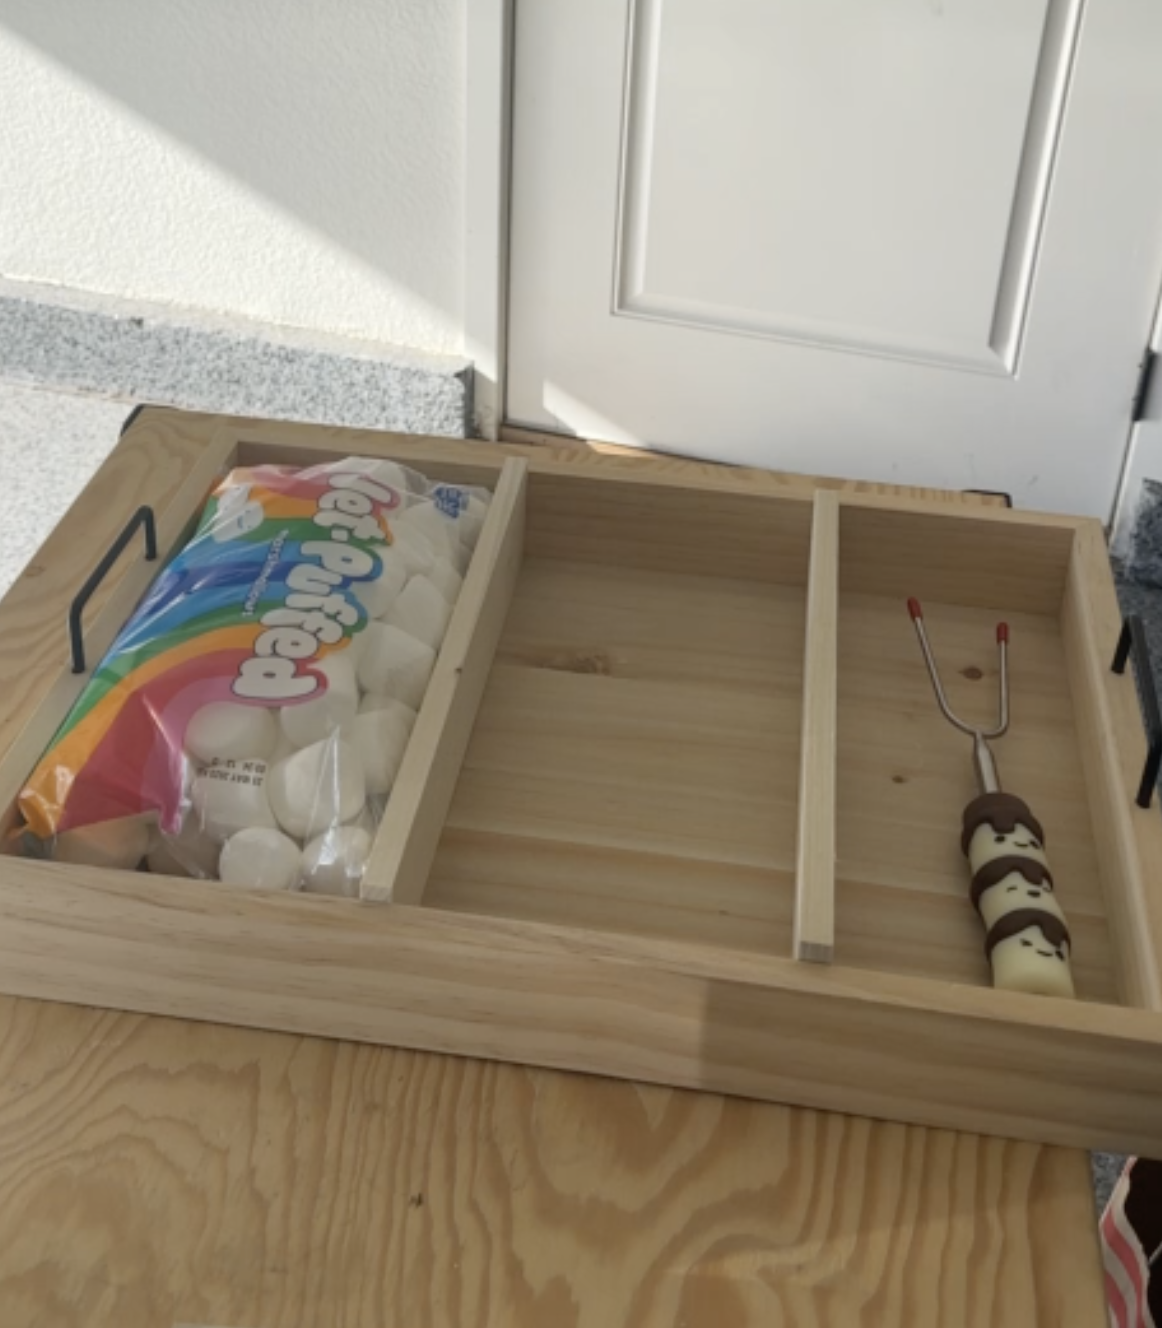
2. Measure how tall the divider pieces need to be by measuring from the bottom of the tray to the top, and cut your 1/2″ x 2″ pieces of wood to that measurement (lengthwise) with your table saw or jigsaw. Notice that mine sit just above the top of my tray, so I had to cut them down to be flush. If you don’t need to cut the long boards down then skip to the next step.
3. Take those pieces of wood that you just cut down and cut two pieces that fit the width of the tray, leaving space for the marshmallows and sticks. Your tray will now be divided into thirds. The marshmallows and sticks will be on either end.
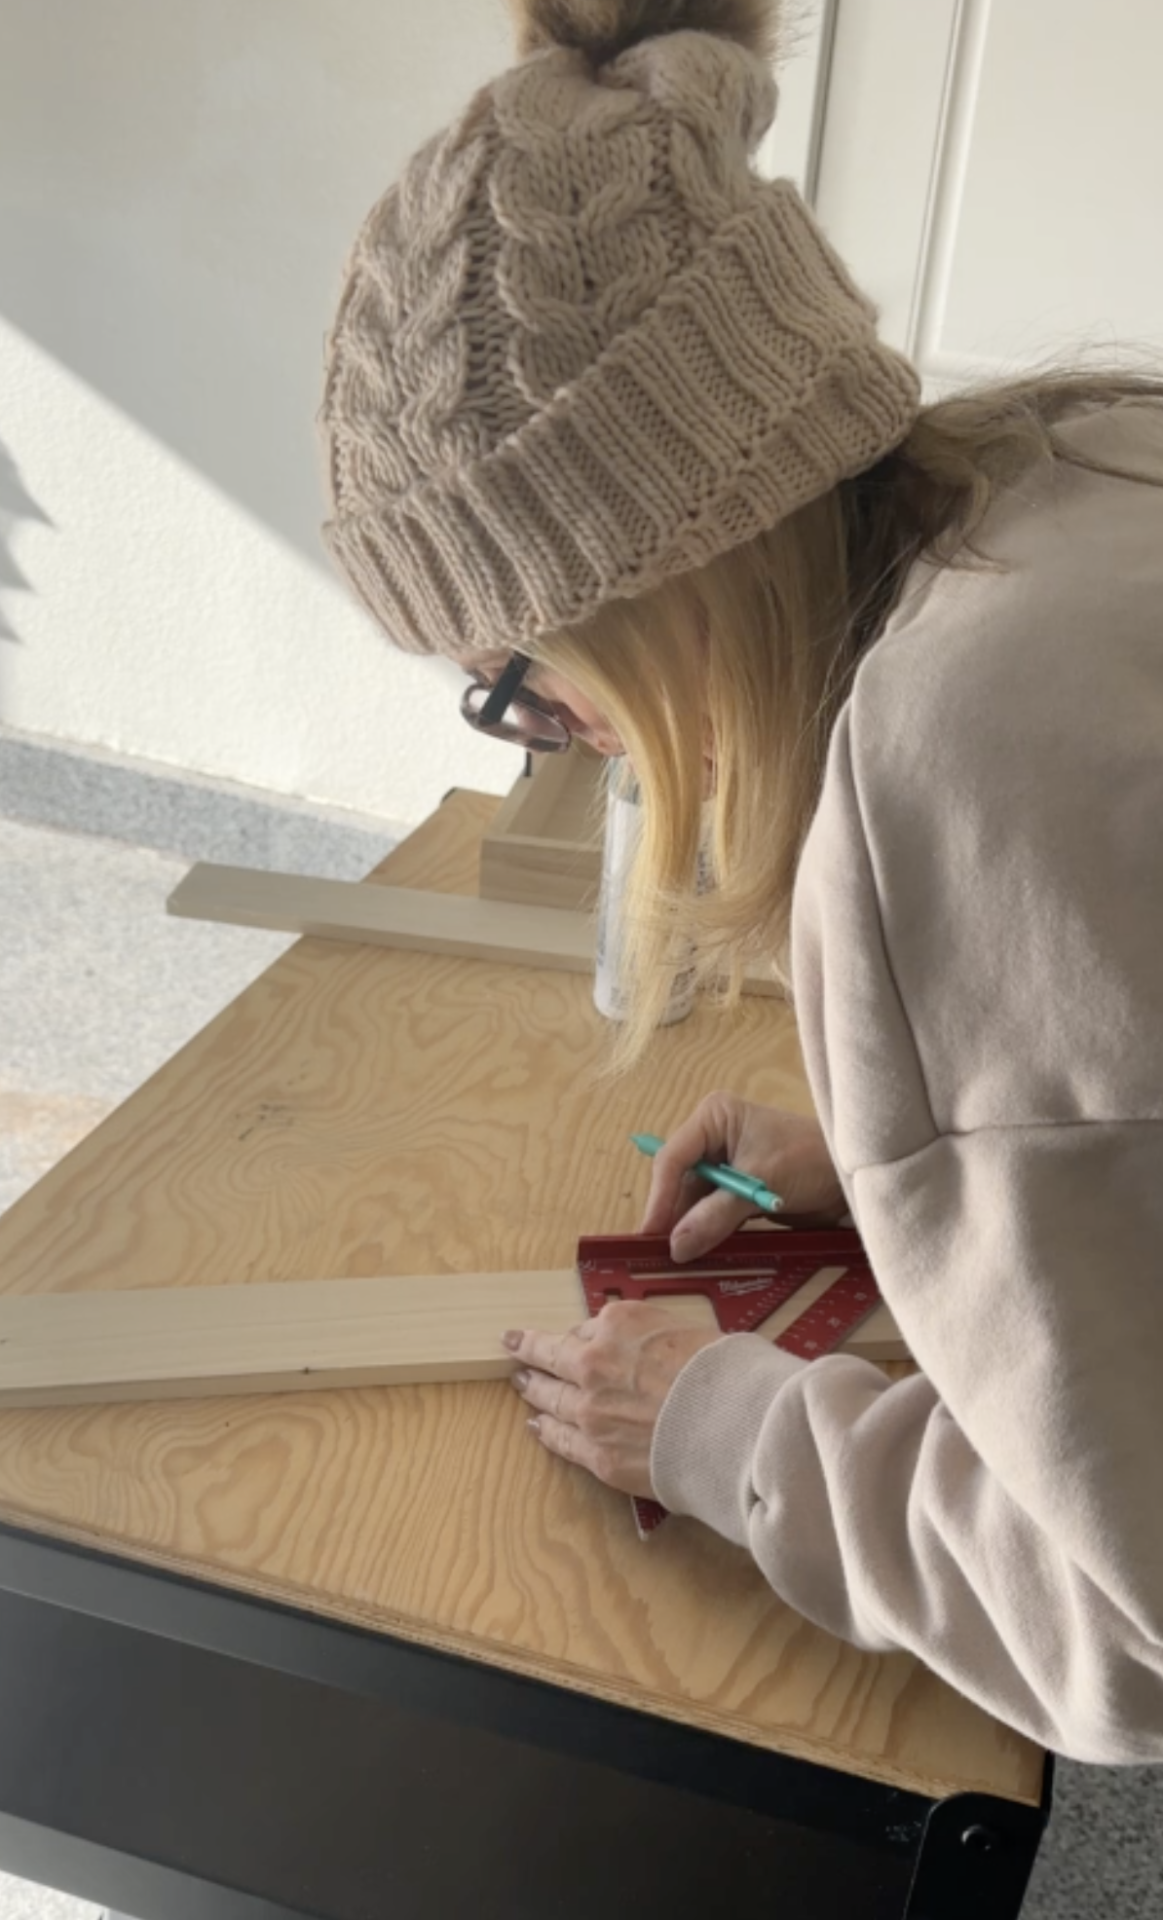
4. Temporarily set them in the tray and then measure the distance between the two dividers and cut two more short pieces to divide the middle section into thirds. Place them in the tray in between the two longer boards, creating a section of 3 smaller boxes. Mark where the boards all meet so you can assemble.
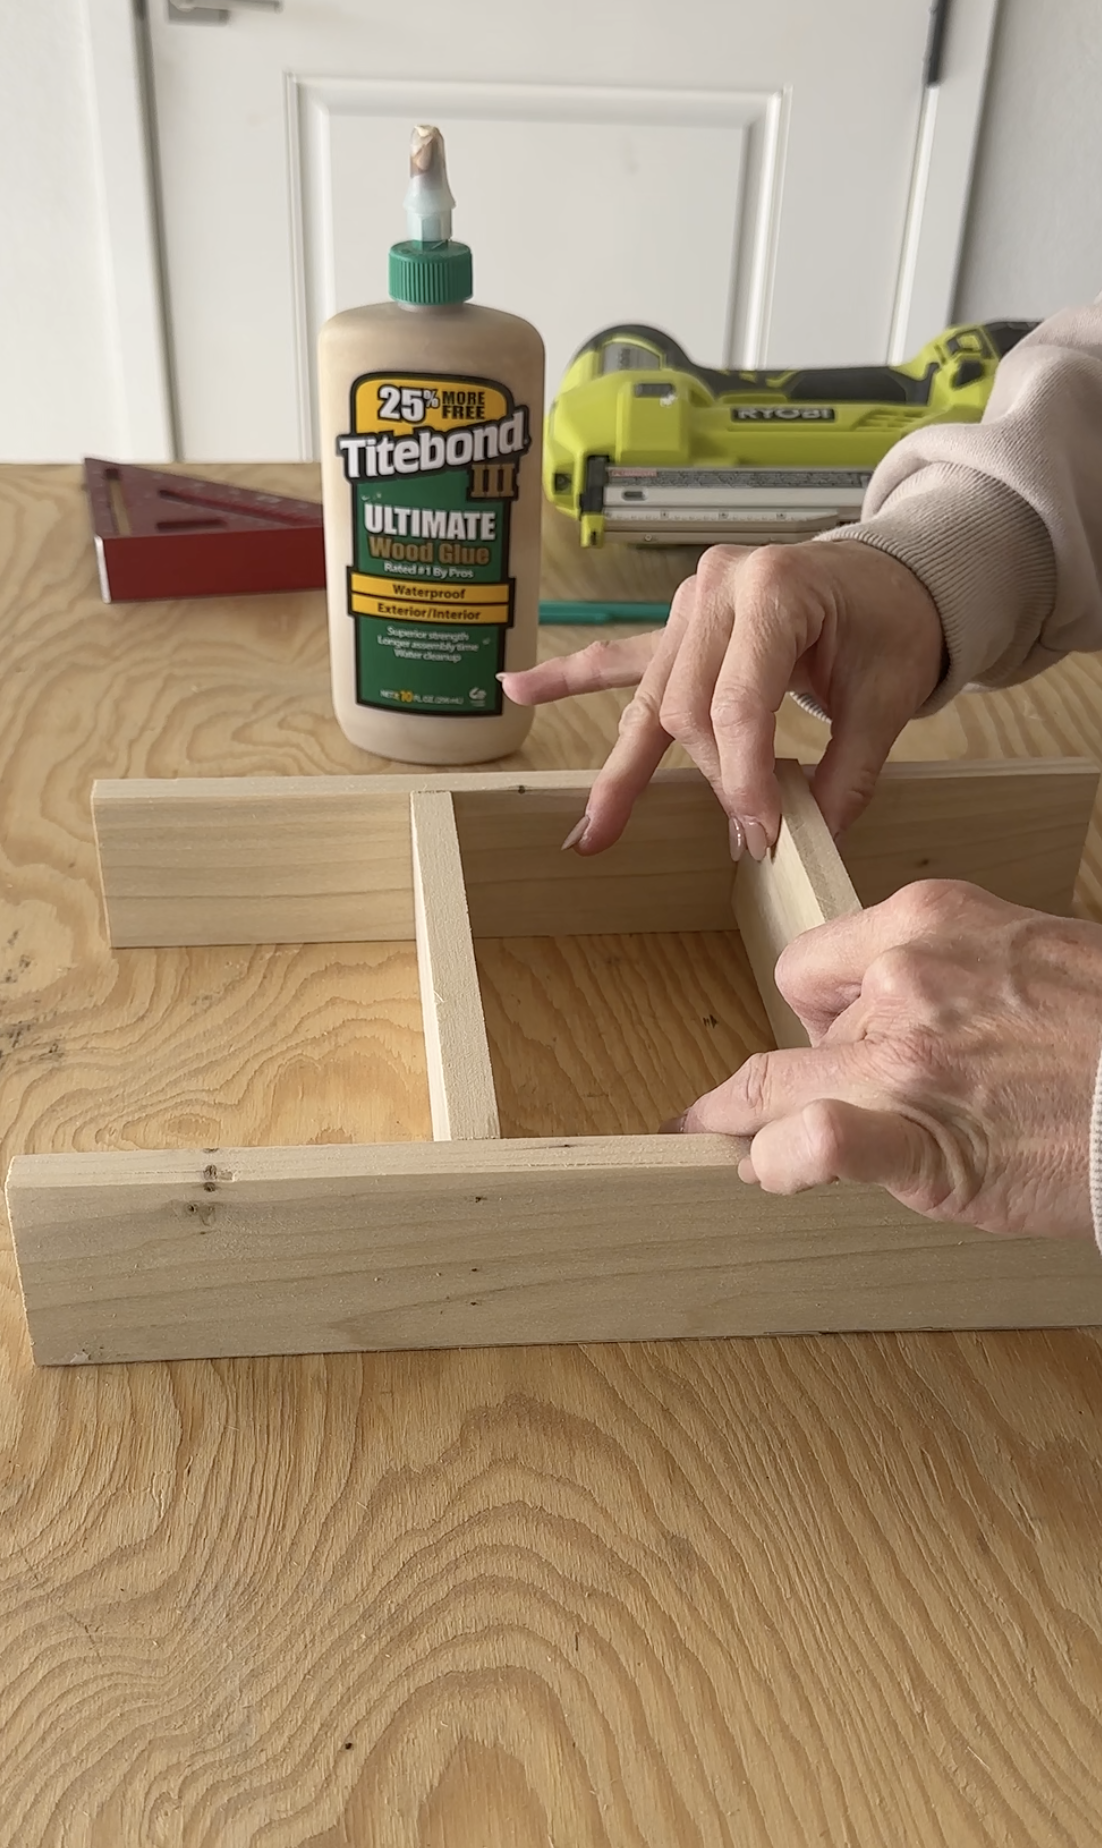
Assembling Your Custom S’mores Caddy
5. Once all pieces are cut and you did a dry fit to get the placement just right, place them on a flat surface and assemble them the way they were in the tray with wood glue and nails. If you don’t have a pin nailer, you can add wood glue and clamp it together until dry.
6. Once the wood divider is dry, add it back into the tray and secure it with glue and nails.
7. Fill nail holes, then sand all filled holes and pieces smooth on the top.
Painting & Personalizing Your Serving Tray
8. Tape off the handles and spray paint the entire tray on the top. Let dry. Turn over and spray paint the bottom. Each side may need two coats, depending on the color you choose.
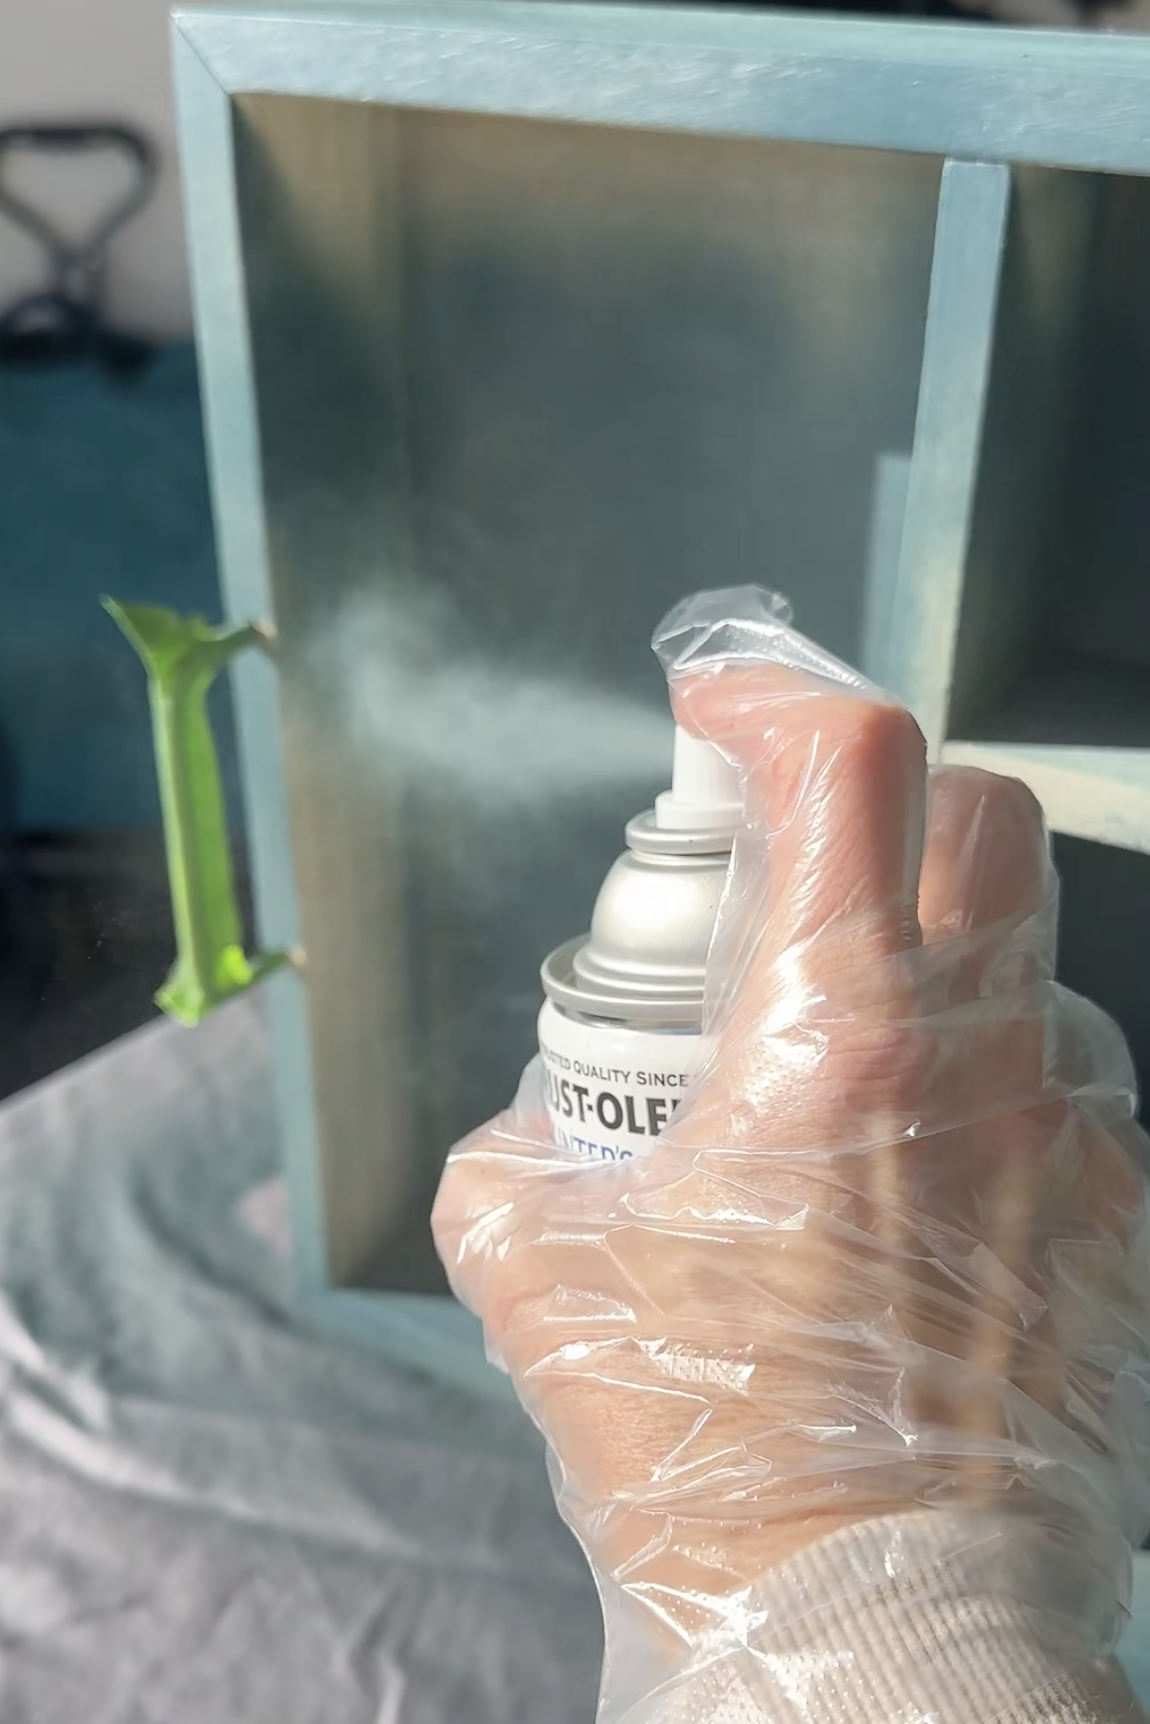
9. While that dries, choose your font and cut out the gold foil letters for your sections. If you don’t have a cutting machine, you can use these gold foil letter stickers.
You will need these section names:
- Marshmallows
- Skewers
- Graham Crackers
- PB Cups
- Chocolate Bars
- Or any name that you want!
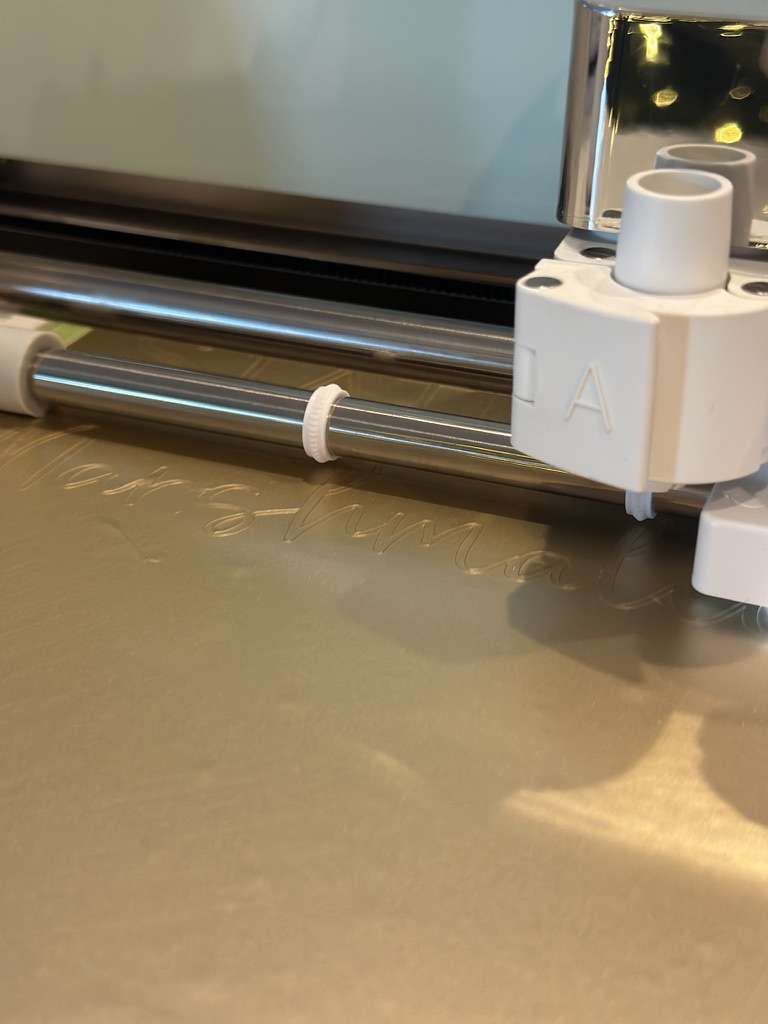
10. Once the tray is done drying, start adding your stickers to the bottom of each section.
11. Go lightly over the tray with poly spray paint to secure and protect the gold foil and painted surface.
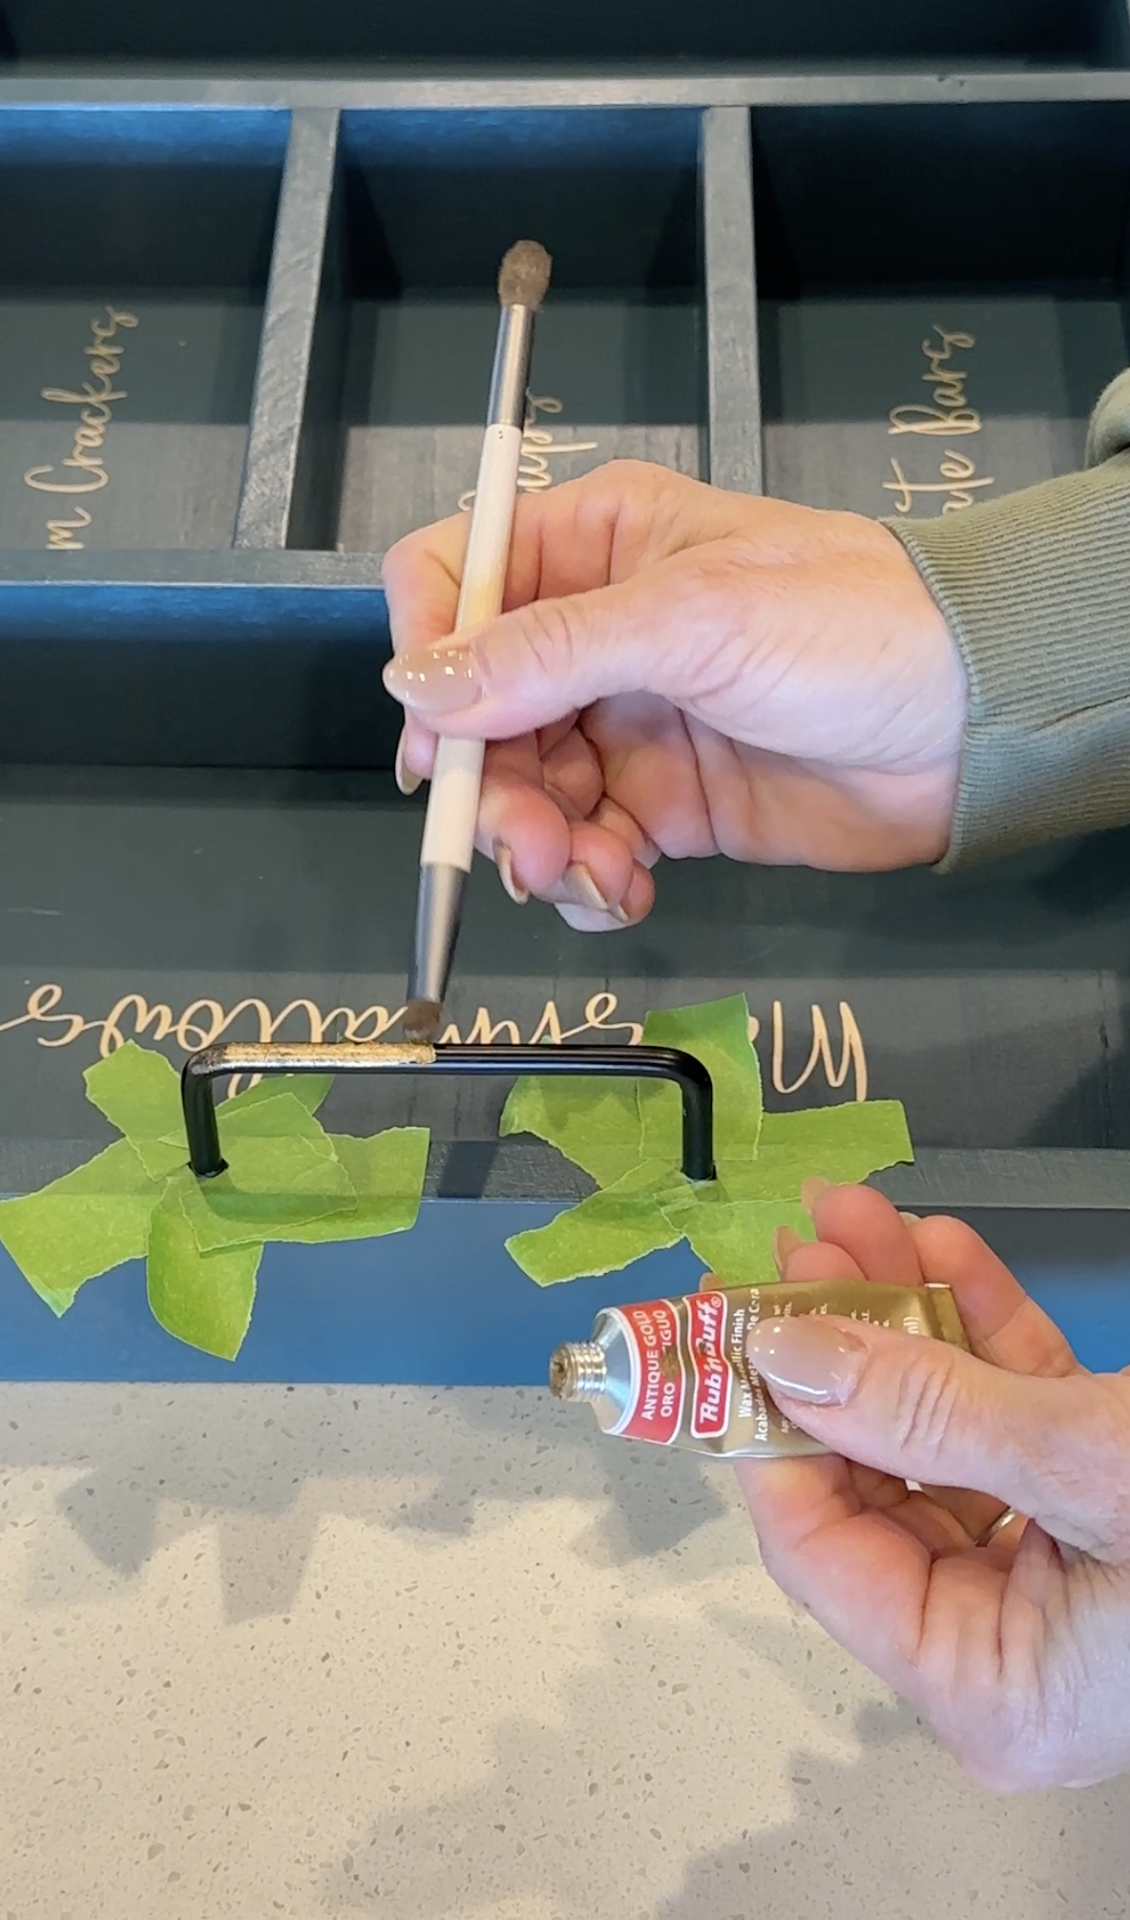
12. Tape off the area around the handles and use rub ‘n’ buff to make the handles gold. This elevates the look!
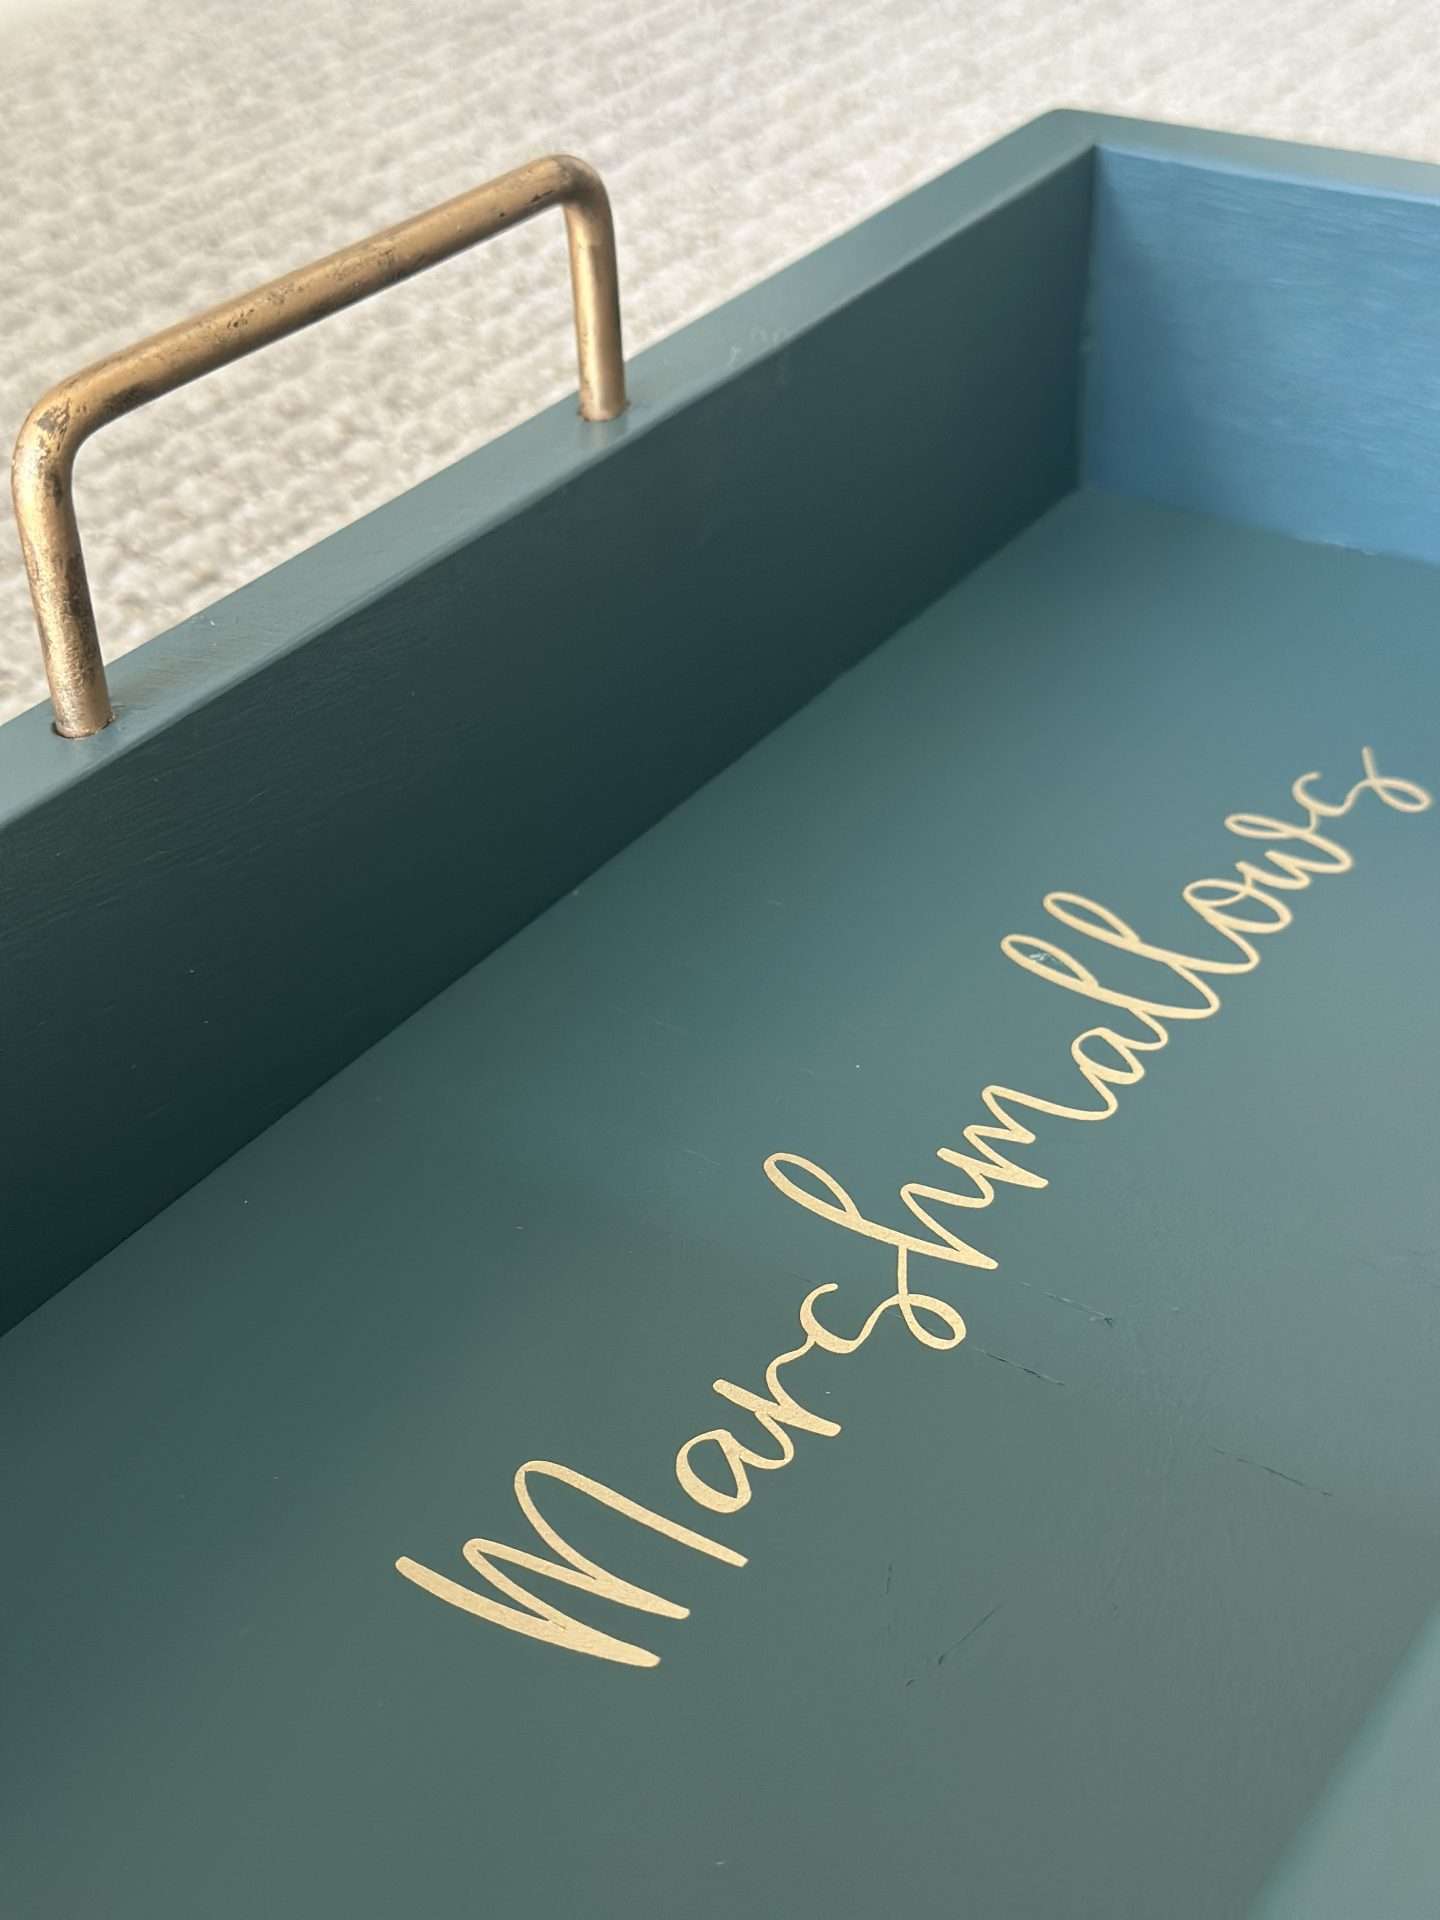
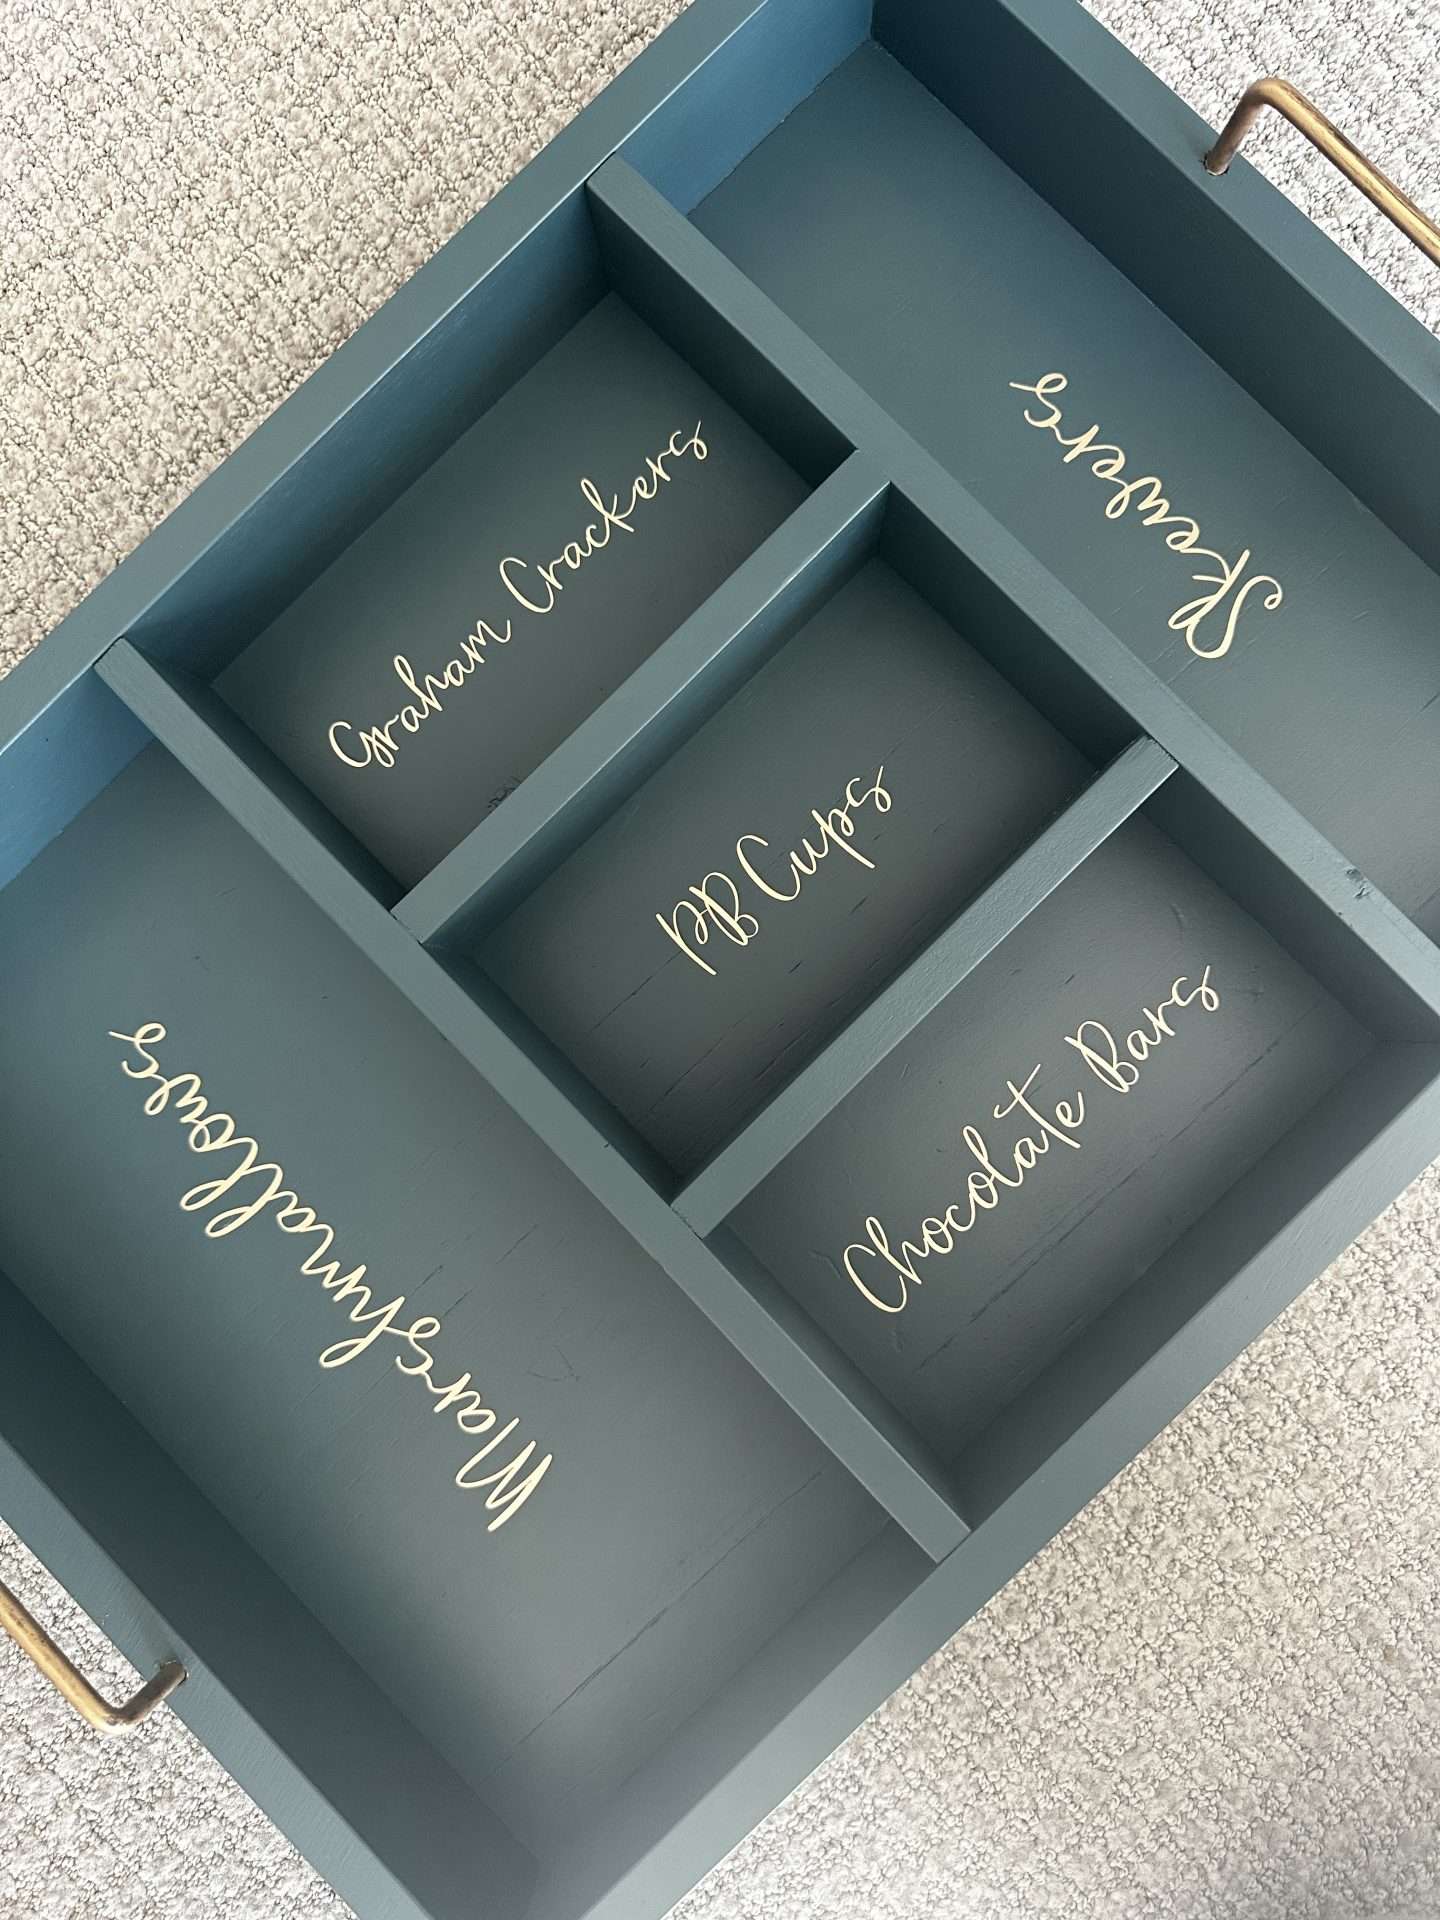
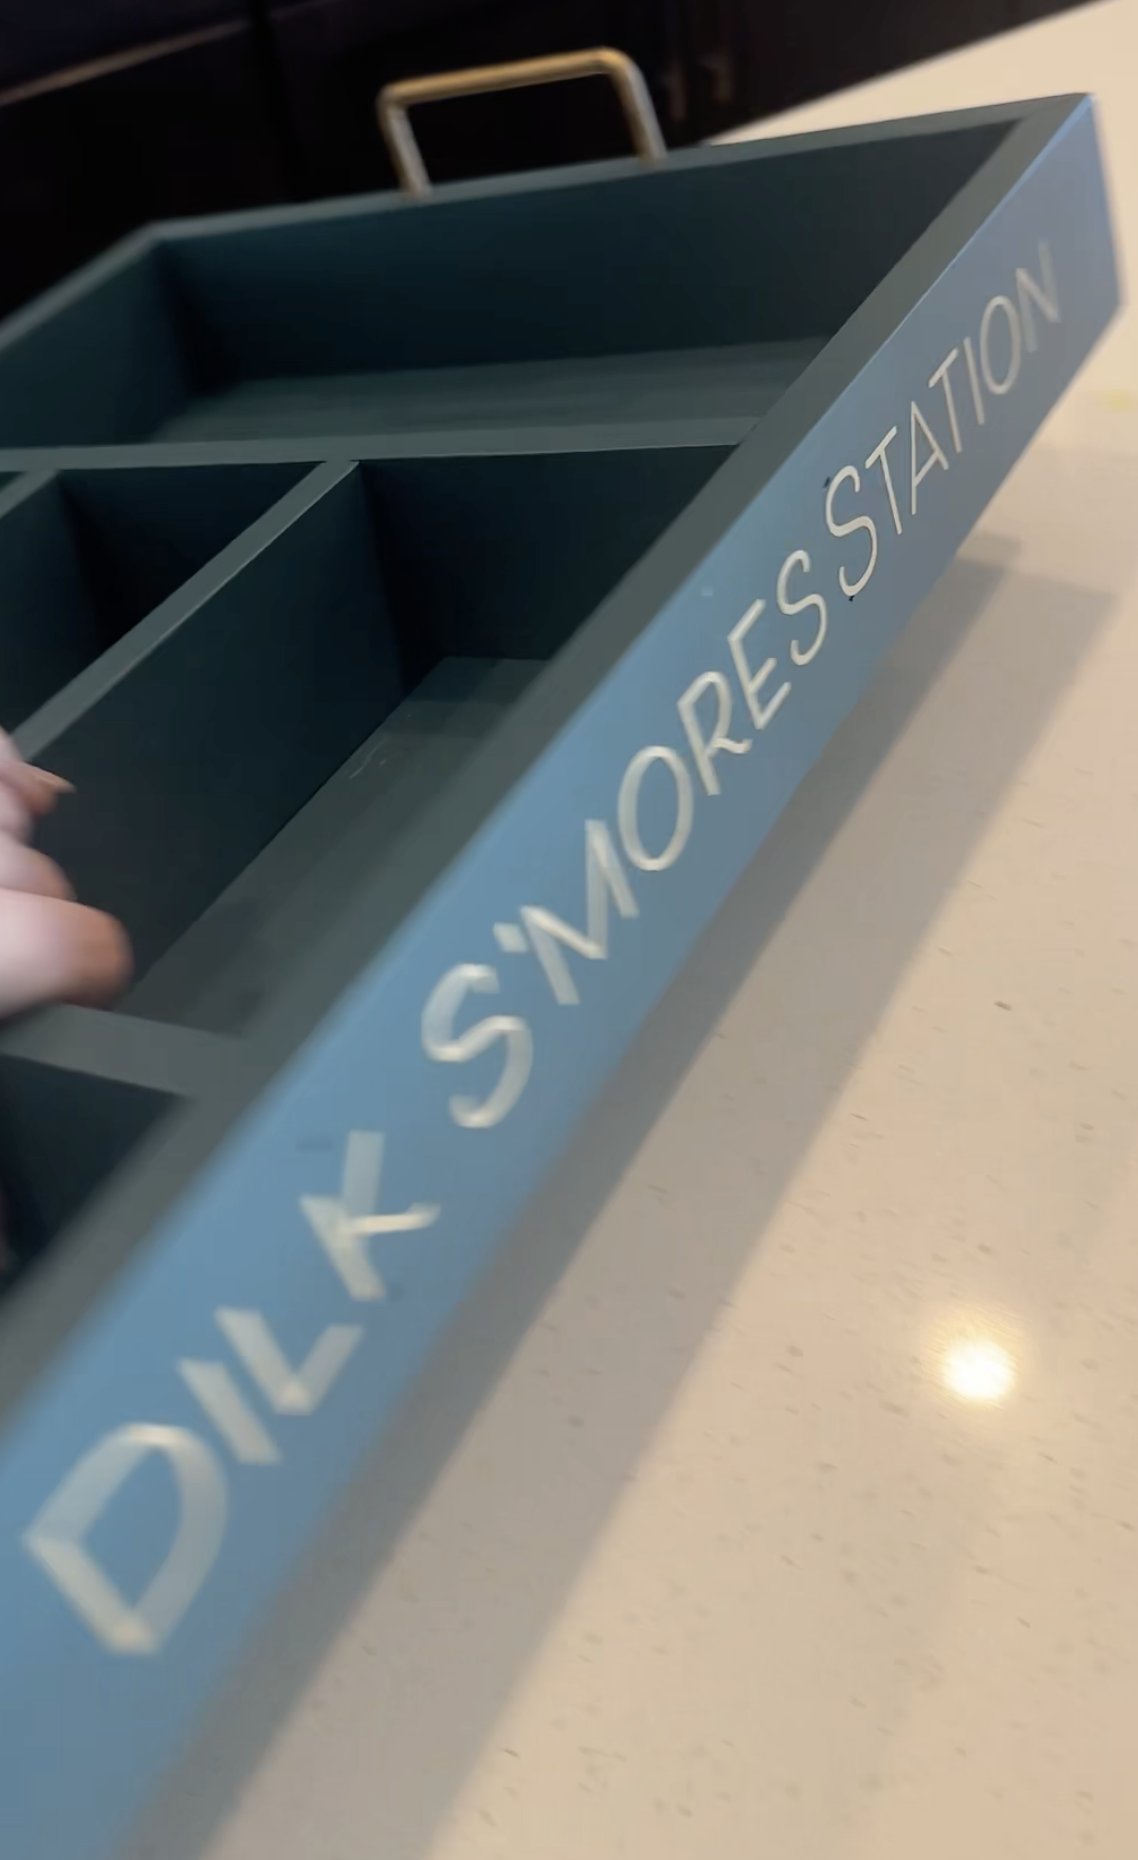
Now you have yourself a gorgeous, personalized serving tray for s’mores!
You could make several of these at once and give as gifts for the holidays.
I added the tray and all the goodies to fill the tray into a large bag and wrapped it all up to put under the tree.
They loved it SO much! Partly because of what it was and partly because I thought enough of them to make it for them.
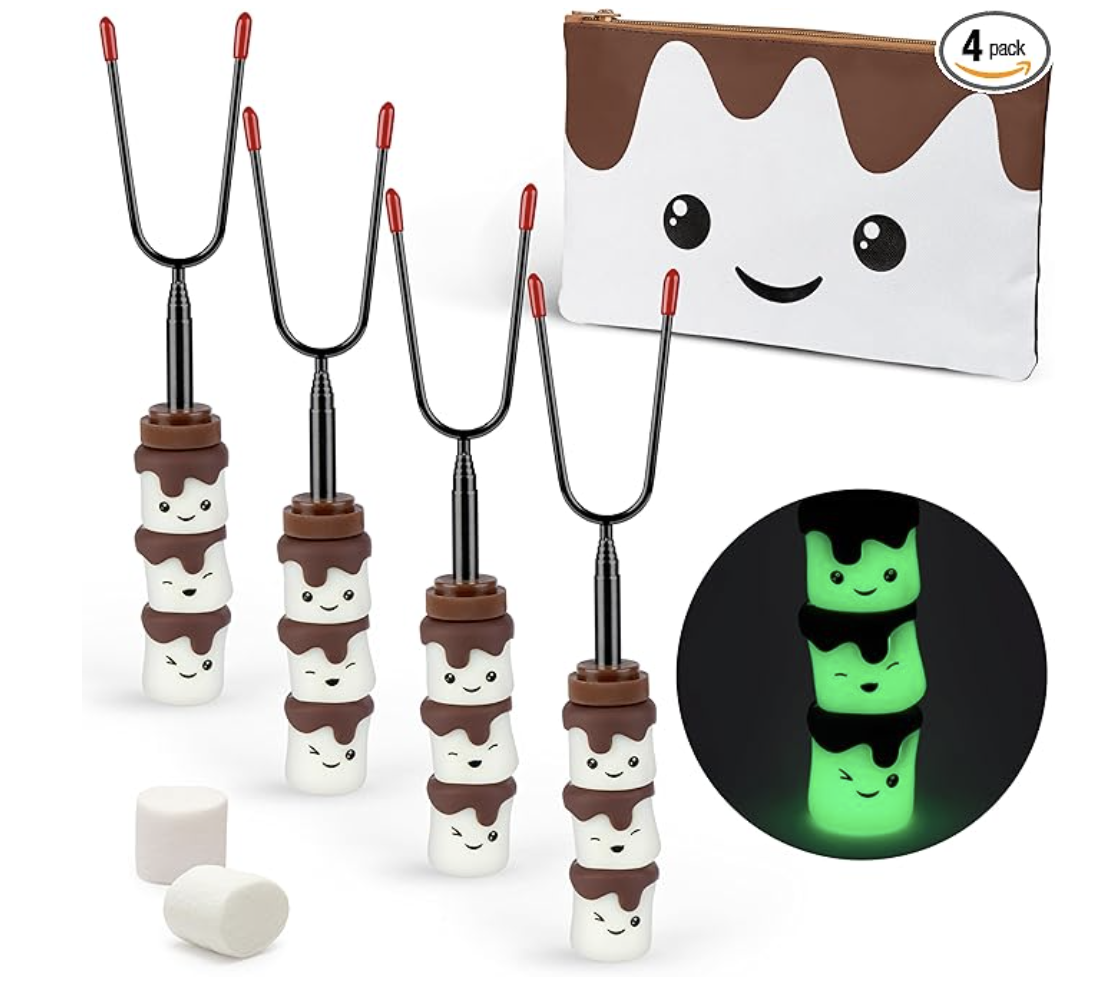
Since my grandkids would be using this, I added the CUTEST little marshmallow skewers. They come in this bag and glow in the dark! I thought the kids would have fun with them.
DIY S’mores Tray FAQs: Your Questions Answered
How can I make a personalized serving tray for s’mores as a thoughtful gift?
You can make a personalized serving tray for s’mores by starting with a wooden tray, adding wood dividers, and customizing it with paint, gold foil stickers, and personal touches like Rub’n’buff. Follow the steps above to assemble, paint, and decorate the tray to create a unique gift.
How much did this s’mores serving caddy cost to make?
This cost me under $30 in supplies and an afternoon of my time on a Saturday. It should take you no longer than 2 days from start to finish, and that is dependent on paint drying time.
What tips do you have for creating a memorable and personalized s’mores gift?
To make your s’mores gift memorable, personalize the tray with name labels or decorative stickers, choose your friend or family members favorite color or one that would work well with their home decor, and add special items like glow-in-the-dark skewers or additional treats. Wrap it beautifully and include a heartfelt note to make it truly special.
What supplies do I need to create a DIY s’mores serving tray?
You will need a wooden tray, a table saw, clamps, wood glue, wood filler, sandpaper, craft wood strips, spray paint, poly spray for sealing, gold foil sticker paper or letter stickers, a cutting machine or letter stickers, Rub n Buff, s’mores skewers, marshmallows, peanut butter cups, graham crackers, chocolate bars, or any other treats you want to include.
How do I assemble and personalize my homemade s’mores serving tray?
To assemble, measure and cut wood dividers, glue and nail them into the tray, sand smooth, then spray paint the tray. Add labels with gold foil or stickers to designate sections for marshmallows, skewers, and other ingredients, then finish with sealing spray and decorating handles with Rub n Buff.
Where can I find ready-made options for s’mores trays if I prefer not to DIY?
If you prefer ready-made options, you can find various s’mores trays in different styles on my list above.
This was such a fun project for me!
The memories made around this personalized serving tray for s’mores will be cherished and treasured, they will remember having all their favorite s’mores treats in one darling place, and carrying this to their firepit. And I think the grandkids will remember those little glow-in-the-dark skewers!
I might have to get a few more of those cute marshmallow skewers as their family is growing.
I hope it inspires you to create something of your own to gift to your friends and family.
If you make one, I would love to see your project! You can share with me on Instagram and tag @aprilcolleenhome!
Or let me know what your ideas might be for this kind of project here in the comments.
And check out my other great holiday content for more ideas!
Remember, you can always do it yourself, but let’s do it together!

Disclosure: This post may contain affiliate links, meaning I get a (very) small commission if you decide to make a purchase through my links, at no cost to you. As a Lowe’s Partner I earn from qualifying purchases. Thank you for your support!
Leave a Reply