Are you looking for a perfect addition to your home or furniture? Let me show you how to make your own beautiful DIY corbel brackets and help you create that one-of-a-kind item that is uniquely yours. They are totally customizable, and the finish is gorgeous!


Have you ever had something in your house that didn’t look like it belongs where it is?
Every time you pass it, it reminds you that you need to do something different?
That is how I felt about the table in my entryway.
It is the first thing people are introduced to when they walk in the door and I wanted it to feel intentional.
What I had was not intentional.
So I devised a plan to build a table unlike any other I have seen and needed to start with the table base.
That is what sparked my journey to making my own DIY corbel brackets from some scrap wood in my basement. Let me just tell you right now. I LOVE THEM!
What is the difference between a corbel and a bracket?
Corbels tend to be more decorative than brackets and are often used as decorative supports.
All brackets are not considered decorative and are more for utilitarian purposes like a shelf bracket or in a closet.
Corbel brackets are just that. A decorative bracket!
Decorative ways to use corbel brackets in your home
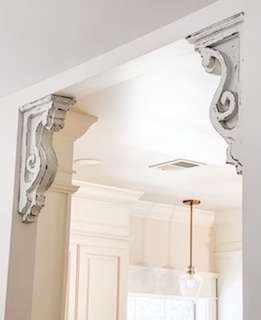
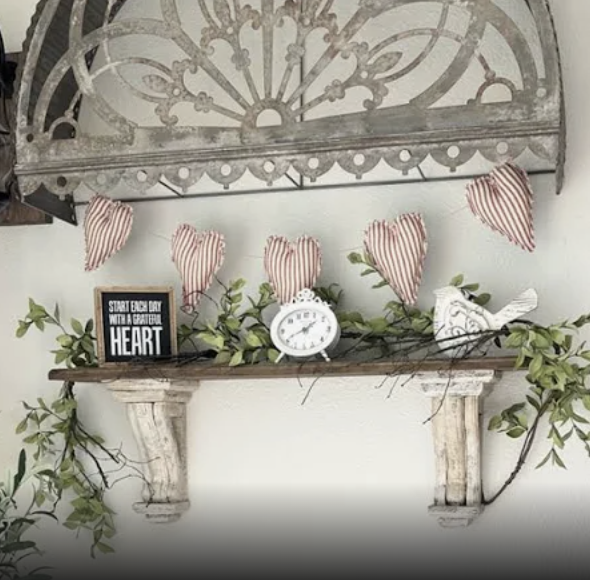
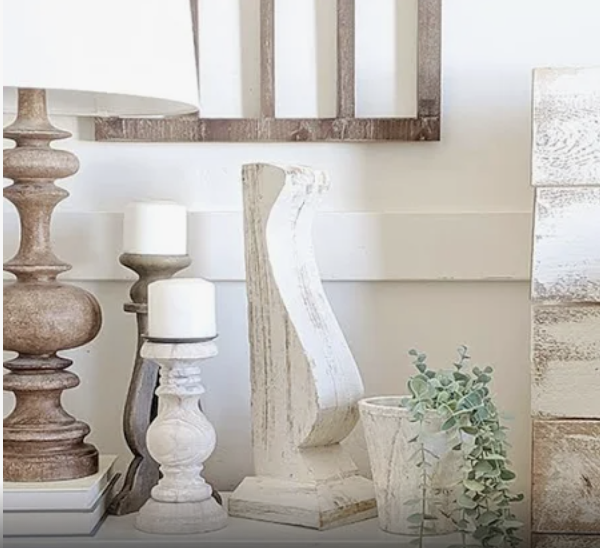
You can use them on top of a hutch or kitchen cabinet as a decorative detail, as a decorative support for a cabinet hung on the wall, or as a fireplace mantle decorative support feature.
Or make a rustic table and use them as the support base like I did!
Why DIY wood corbels?
Let me tell you my story.
The best part of DIY is that you create something that is totally customizable for your home and spaces. And it applies to the corbel brackets that I am about to share with you.
You can make these in any shape and size. They can be simple or more detailed. There are no limits!
Building your own corbel brackets gives you the freedom to make them for whatever application you want and in whatever style and size you want.
When we moved into our modern farmhouse I walked in with an old dresser on moving day, set it down in the entryway, and there it stayed.
For two years.
It just kind of landed there without any thought as to why it was there or what its function was.
It never asked to be moved and I didn’t think about it again….until I did.
The dresser started to get on my nerves because it was kind of in the way of our walkway and I knew the space could be better without that dresser.
But I wasn’t sure what belonged there.
Since the space isn’t that big, I didn’t want a table protruding too far into the entryway nor did I want one that I didn’t totally love.
So, much like the entry table in my last house, I embarked on building another entryway table.
But this time I would make my own corbel brackets with all the charm and wear of years of use.
They would be decorative and functional.
I began to Google wood corbels to purchase.
I was so close to pulling the trigger on a pair that I liked, but I really didn’t want to spend $450/corbel for the size I wanted. That is $900 for shelf brackets without the shipping cost added in!
I also found this pair of farmhouse corbels on Etsy. I love the shape, they are 19″ long and they could go farmhouse, vintage, or even transitional, and less than $100 for the pair. Not bad!
But I wanted something just a little more rustic for mine and without the scalloped curves.
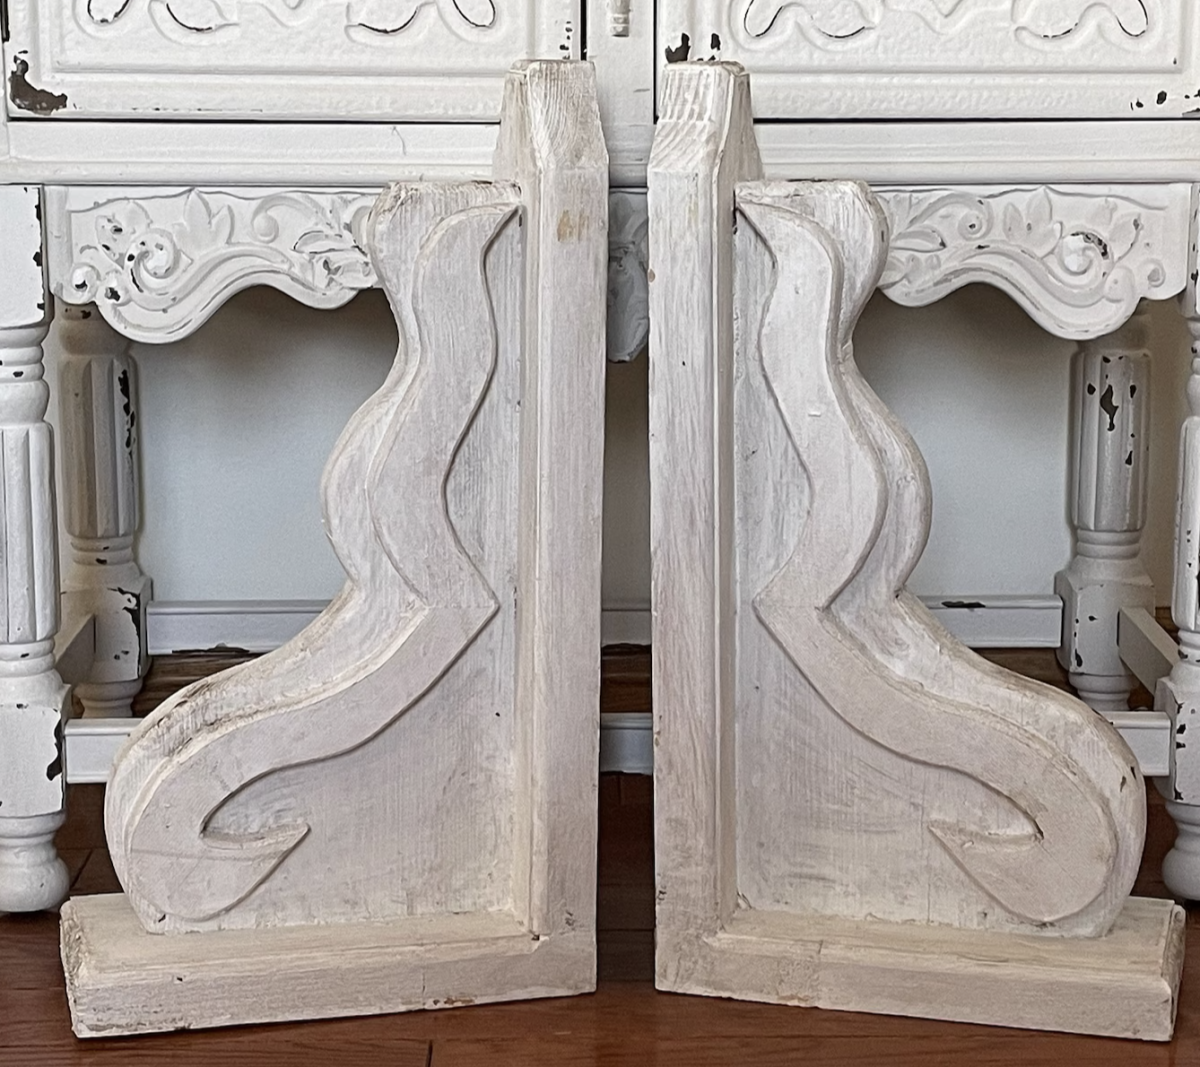
So, naturally, I did the next thing that came to my mind. I decided I would try to make them myself.
If you know me at all, then you’re not surprised.
On a whim, I ran to the basement and started looking at my stash of wood from past projects, and found some 2×6 boards.
Perfect!
I told myself I could always buy them if they didn’t work out.
But, I find that things always seem to work out if I just try.
Where to find inspiration for the shape of corbel brackets
Before I started I needed inspiration for the shape of my farmhouse corbels.
What did I think I would actually be able to make without having to use a chisel?
I looked around my house for inspo and landed on the table base of my Restoration Hardware dining table. So I started studying it.
I never noticed that the base is a few separate pieces of wood that are glued together to look like one massive piece.
So I thought to myself, “why can’t I recreate that?”.
So I just went for it!
Supply list to DIY corbel brackets:
Here is a shoppable list of the supplies needed for the corbel brackets.
- Wood. You may have some in your stash or you may have to go to the store and purchase wood that is large enough and deep enough for the size you want your corbels to be. Mine would be 5.5″ deep so I used my leftover 2x6s. Buying them from Lowe’s is also not that expensive.
- Template – I used printer paper taped together to get to the length I wanted
- Marker/Pencil
- Miter Saw (optional: to cut your 2×6 into pieces if needed or you can use your jigsaw to circular saw)
- Table or track saw (if you want to cut the long straight side of your corbels, completely optional)
- Clamps
- Jig saw
- Wood glue
- Sander/sand paper in 80grit and 120 grit
- Nails/nail gun (nails and hammer or screws are optional if you don’t have a nail gun, also screws and a drill if that is all you have)
- Wood filler (if you want to fill the gaps)
- Distressing tools – hammer, chisel, nail punch, drill, my favorite wire brush set
How much did my easy DIY wood brackets cost?
I wasn’t sure how I would do it, or what it would look like in the end, but my mind was made up. I was going to make this work!
FREE is the best price and one of my favorite words. And these would be free if they worked out because I already had the studs left over from another project. And I already had the tools. That counts as free, right?
The 2 x 6 studs will cost you about $50 total and get you 8 cut-out pieces; 4 per corbel.
I wanted the corbel brackets to be long, to be table height, to almost touch the baseboard and I wanted them to be simple and really distressed. Just like I happened upon them in an old barn.
My decor style is not farmhouse. But I wanted more of that reclaimed Restoration Hardware look. And I always love the juxtaposition between rustic and elegant.
How I made shelf bracket corbels out of wood
DIY RH Inspired Corbels
All the inspiration to make your own RH inspired DIY corbels. You can make a table base, frame a doorway, bookends, decor….the uses are endless and they are totally customizable!
I wanted to make two corbels for my table base and needed to find inspiration for the shape of them.
I looked around my house and found that my dining table base was exactly the shape I was going for so I got started.
So here is how I did it.
Step 1. I taped together some printer paper and traced the edge of the table base onto it. I adjusted the outline a little to form what I wanted the farmhouse corbel to look like and then headed out to the garage.
I cut the template and traced the outline from my taped paper onto one of the boards.

Step 2. I wanted the backs of the farmhouse corbel to be flat so I cut the rounded edges off of one side of my 2×6 boards with my track saw so that when I glued them together the edges that would be on the back would be more sharp and, when glued together, they would be nice and flat against the wall.
Step 3. Then I took my jigsaw and started cutting around the outline from my template.

It was hard to cut through the 2×6 but I just took my time and got through it. I had to change the blade to one that cut the wood more easily. After tracing and cutting 7 more pieces my hand was cramping but I was so determined to make this work out.
Step 4. Each piece wasn’t cut perfectly, but the general outline of the shape was there. Taking my nail gun and wood glue, I began to stack the pieces on top of each other, gluing and nailing one cut-out piece to the next. I did that with the first four to create one corbel.
I repeated the same steps with the other 4 pieces and I now had two corbels.
The end result would be two corbel brackets that were 26″L x 6″W x 5.5″D each. These are rather large and I LOVE THEM! But I still needed to work some magic.


Step 5. Once the glue was dried I took my orbital sander with 80 grit sandpaper and got to work sanding off all of the rough and uneven edges and making them all even. It was so easy and made such a difference.
Once they were more even I changed to a 180 grit paper and repeated the sanding. Then I filled in all the gaps between the pieces of wood with wood filler and let it dry.
**TIP: MAKE YOUR OWN WOOD FILLER. Take the sawdust from the project you’re working on and combine it with a little wood glue. Then use that as wood filler! It is easy to sand, makes a solid fill and when you stain it, it will match the rest of your project because you used the sawdust from the wood you’re working on!
Once dried I had to sand them again.

I now had two corbels that looked amazing after some sanding. They didn’t start that way with all of their rough edges and uneven surfaces, but sanding made that all go away.
They were so close, but not quite what I wanted yet. I still needed them to give them that “found” look.
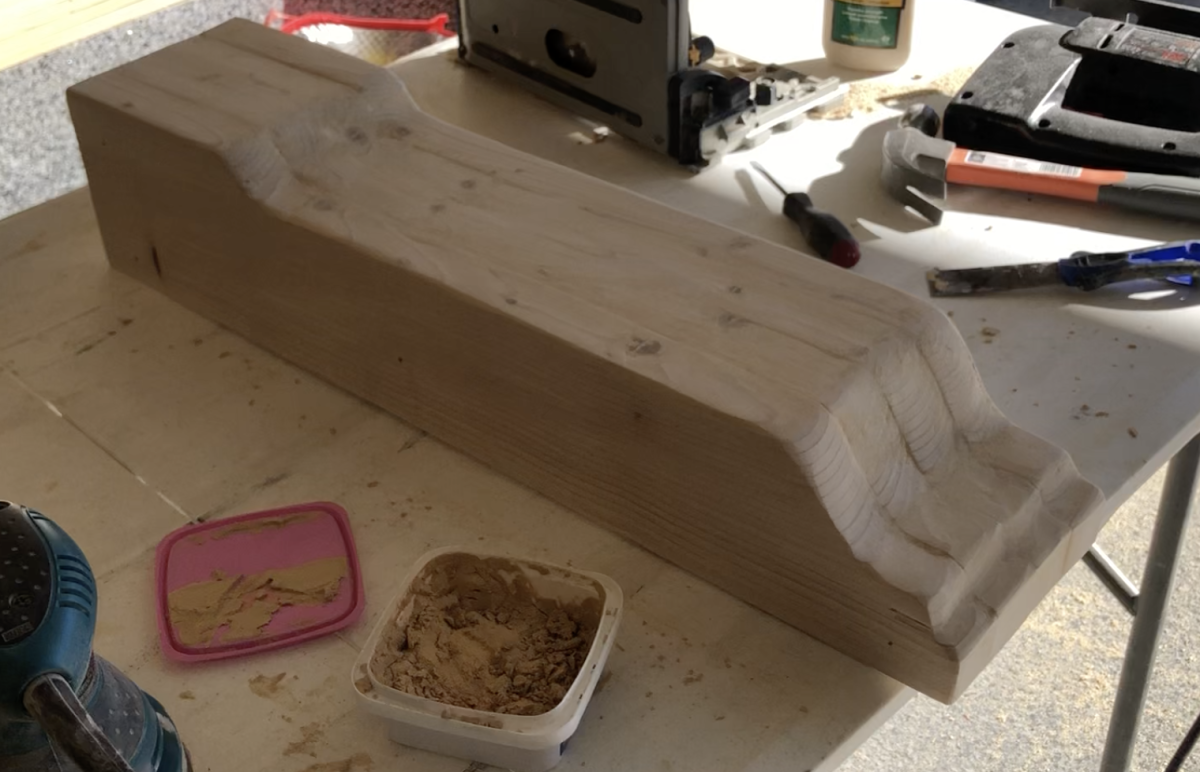
Step 6. It was time to distress them. To do this I took a hammer, a chisel, a nail punch and this wire brush set that attaches to my drill and got to work.
I pounded the edges with the hammer.
I ran my chisel down the sides to create deep grooves and chiseled away some of the edges.
I pounded my nail set into all sides of the wood in groups of 3-5 holes in one spot to make it look like small wormholes.
It was actually quite therapeutic, haha!
Then I attached the wire brush to my drill and made deep brush marks.
And I kept just kept going on like that until I had a result I loved.
There is no right or wrong way to do this. Just go until you achieve the look you want. (Or you have too many splinters. I recommend gloves.)
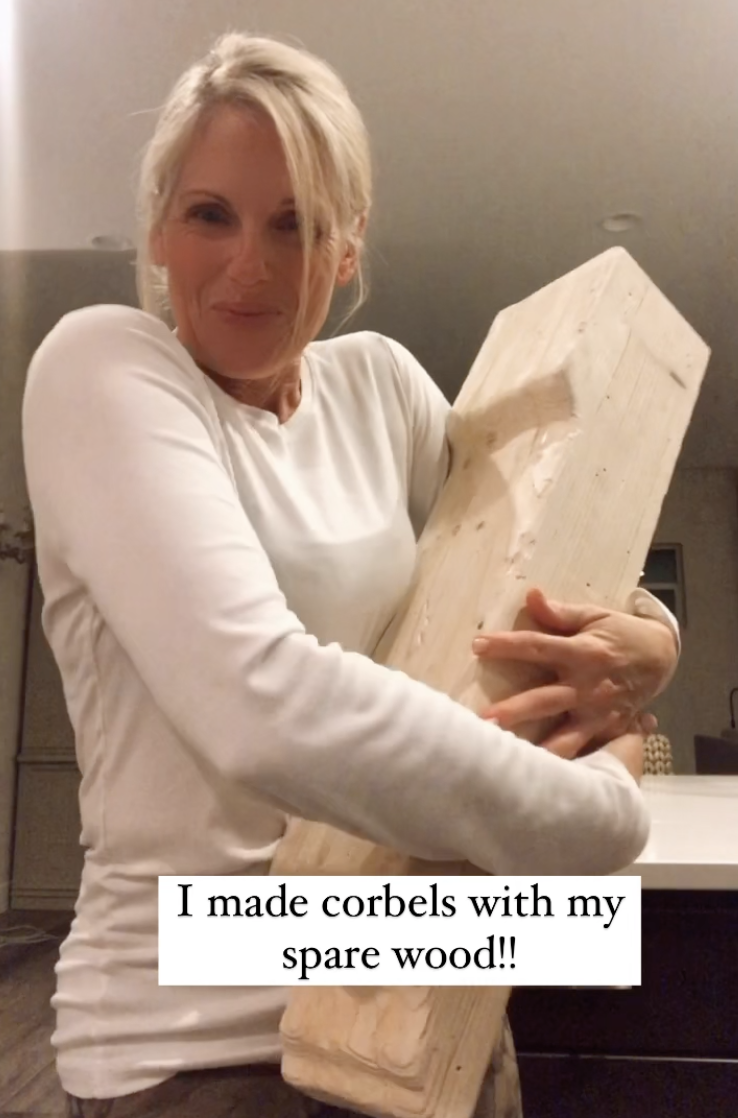
They look amazing. Just what I wanted. Perfectly imperfect. And look at how big they are!
The beauty of DIY is it is totally customizable.
So many possibilities! Let me know in the comments if you would ever attempt a DIY like this!
No? Just me?
Stay tuned to see how I added a beautiful stain to give these that Restoration Hardware look, will reveal the formula, and show you how to do it.
As always, I am here to help inspire you to create beauty in your home through DIY. Do it yourself, but let’s do it together!

Disclosure: This post may contain affiliate links, meaning I get a (very) small commission if you decide to make a purchase through my links, at no cost to you. As a Lowe’s Partner I earn from qualifying purchases. Thank you for your support!
Leave a Reply