Looking for gingerbread village inspiration? I am sharing how to DIY the cutest little gingerbread village and giving you my number one tip for putting it all together without frustration. No baking is required! And it can be done in an hour.

I think that gingerbread houses are so, so cute!
And I know they can be downright beautiful. I mean B-E-A-utiful.
Have you ever seen a gingerbread house competition?
Where I used to live there was an annual home competition at our local civic center for gingerbread houses!
No joke, they were some of the most beautiful and creative gingerbread houses I have ever seen.
One of my good friends entered the competition and her gingerbread house was stunning. She was inspired from Martha Stewart’s book and created a masterpiece.
She made the whole thing from scratch. I had sugar glass windows made from scratch and painstakingly poured and the whole thing lit up from the inside. The house was 2 1/2 feet long and 2 feet high.
It was magnificent!!
Everything about that house was done to perfection and she won the whole competition.
I wish I would have gotten photos of it but this was back in the ’90s before you carried around a mini photo editing studio in your back pocket. But trust me, it was spectacular!
It was something like this magnificent Gingerbread Downton Abbey, but on a smaller scale.

So I recently decided to take that inspiration and create the cutest tiny gingerbread village.
But no baking! Just an afternoon of “sweet” fun, pun intended.
What is the easiest way to put together a gingerbread house?
Forget putting them together with frosting.
My number one tip is to get yourself a hot glue gun and glue your house or houses together.
If you want them to look like you did it with frosting, pick up a package of white hot glue sticks!
This is especially useful if you are doing a gingerbread house decorating party and have to assemble them for kids or friends to decorate.
The kits are meant to be put together with the included frosting. But, in my many attempts over the years to make the frosting method work I have concluded that it takes too long to dry while hot glue is fast giving you an immediate result and you can quickly get to the most fun part; the decorating!
You will be ready to decorate in minutes if you use hot glue to assemble them.
How long will a gingerbread house last?
You’re supposed to put your gingerbread houses together with frosting, especially if you want to eat it, but we have NEVER eaten our gingerbread houses. Not ever. So I always hot glue them together to save time and sanity.
If you put them together with frosting, and want to eat them, they are typically edible for a couple of weeks.
If you don’t plan to eat them, you can carefully pack them away and they will last for YEARS. (I keep mine in a cabinet under my island in my kitchen with my holiday dishes.)
I just use them over and over again as part of my holiday decorating.
The easiest way to make a gingerbread village
You can make gingerbread dough, roll it out, cut out all of your pieces and bake them, and then assemble them with frosting.
But, for this little decor project, I used this gingerbread village kit instead.
And then I took it to the next level and didn’t include any of the candies pictured here.

Supplies you need to make a gingerbread village:
- Mini gingerbread house kit
- hot glue gun and glue sticks
- frosting bottle with included tip for fine details
- Piping bag (optional and you can use tips included with the frosting bottles)
- Artificial snow
- Twinkle lights
- White premade frosting
- Toothpicks
- Powdered sugar and shaker (to add as optional snow on the houses)
- Small boxes or some small item to lift a couple of the houses and create height. I used empty ribbon spools.
- Faux or real pine branches/sprigs or bottle brush trees
How to Make the cutest Gingerbread Village
- Hot glue your tiny houses together.
- Add the white frosting included with the kit to your frosting bottle.
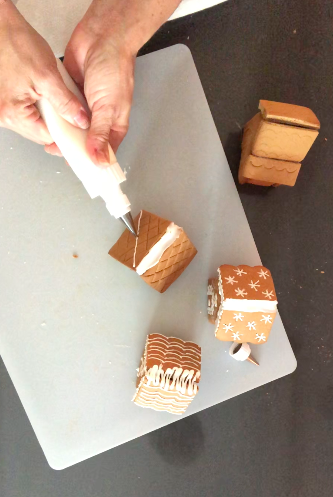
- Add your designs to your houses. Get creative with shingles, wreaths, doors, scallops, faux icicles, etc. There are design lines on the houses that you can follow or just create your own!

- Let it all dry.
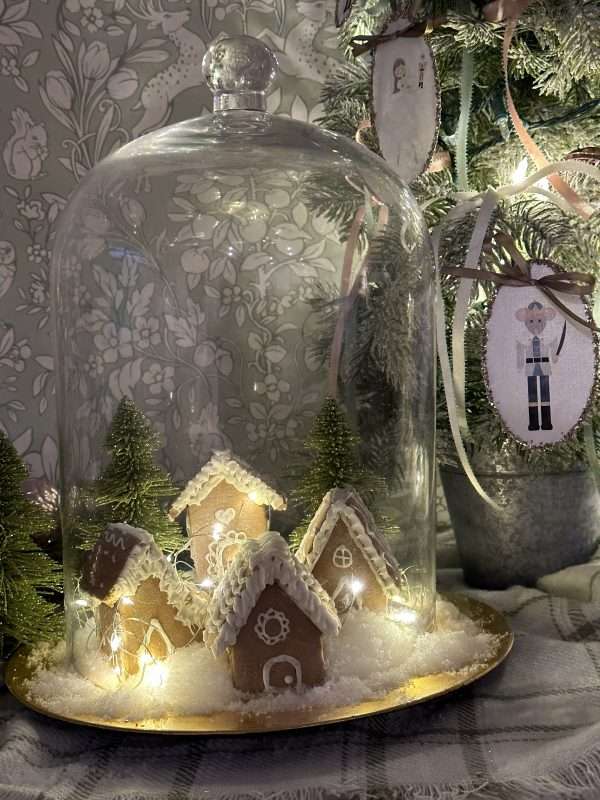
- Spread artificial snow on a plate, marble tray, wooden serving tray, or wherever you will display your houses. I chose a plate from my cabinet to keep all the snow in one place with my oversized cloche on top. I thought it looked pretty like a little snow globe.
- Add gingerbread houses on top of snow and adjust them at different heights with the small boxes (risers for height) to add interest. You can hide the little “risers” with snow, branches or trees.
- Add pine branches or tiny bottle brush trees.
- Add twinkle lights.
I chose to ditch the candies and colored frosting included with the kit and use only white frosting. I wanted it to be elegant and cohesive with other decor, so I eliminated any color.
How to decorate with a gingerbread village
This year I put mine on a gold charger, under a large glass cloche with faux snow and small bottle brush trees, but you don’t have to do this!
You could put them on a shelf, mantel, or a pretty wooden or marble serving tray in the middle of a kitchen island.
They are so, so cute and look so pretty at night with the twinkly lights!
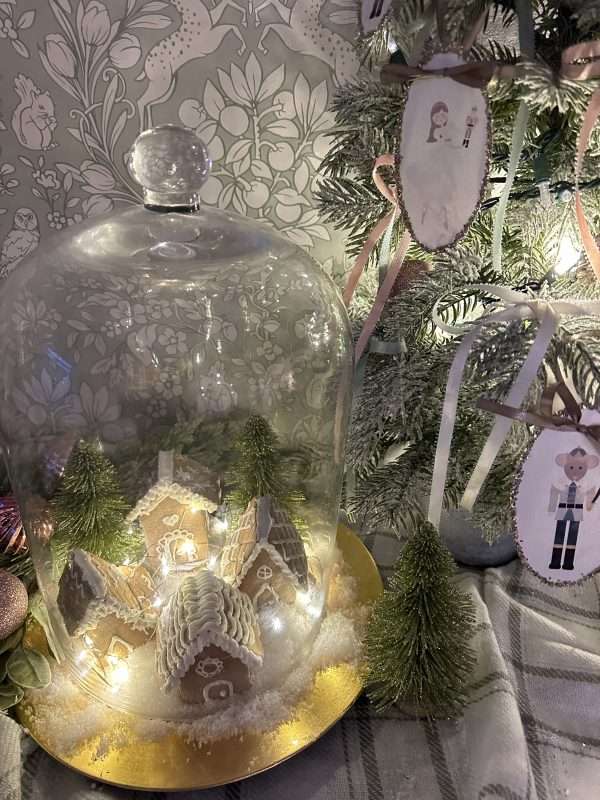
Aren’t they just adorable??
This is a great craft to do for the holidays and adds such a cute element to your holiday decorating.
I hope you have found inspiration in this adorable tiny gingerbread village and want to create something like it for yourself!
I would love to see what you create and how you use it in your own home.
For more holiday inspiration, check out my other holiday posts.
- These DIY Nutcracker Ornaments
- Make this stunning fireplace mantel
- Learn the best way to hang garland
All this and more!!
Remember, you can do it yourself, but let’s do it together.

Disclosure: This post may contain affiliate links, meaning I get a (very) small commission if you decide to make a purchase through my links, at no cost to you. As a Lowe’s Partner I earn from qualifying purchases. Thank you for your support!
Leave a Reply