After finishing my basement and diving into finishing the unfinished basement bathroom, I am sharing how I easily tested for a shower drain leak with an inexpensive yet crucial little tool that saved me so much time and money.
Installing a drain in a new shower can be a challenge and kind of scary. If you followed along this journey with me on Instagram stories, @aprilcolleen, then you saw all that it entailed and the issues I ran into.
In my last house, I also finished the bathroom in the basement and never had any issues. But this one was a doozy. It was the way the plumber installed the drain in the concrete that made it a little more difficult than the last.
But, some problem-solving and some perseverance got me through!

I started the shower installation by choosing a waterproofing method that I felt would be the best for this project. The shower is in the basement and is adjacent to two bathrooms. You can see what waterproof method I chose and how I installed it in my last post.
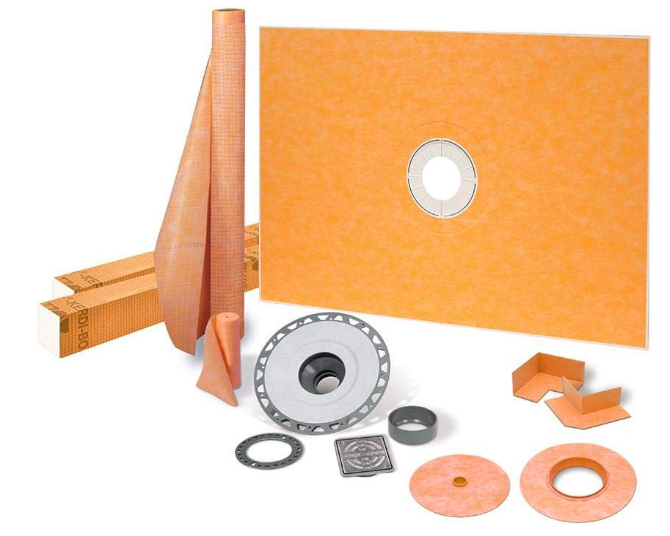
The kit I chose contains the necessary pieces to complete the project easily. See how I had to have the drains moved in my foundation and fix the broken concrete before I could start installing the shower.
My advice is to buy your kit first and then shower it to and talk to your plumber (if you hire one) about what kind of drain you need and how high it needs to sit out of the concrete. Show the plumber your drain and kit and he can set it correctly for you. Here is the waterproofing kit I chose for my shower.
Once the shower pan was installed I had to connect the drain parts. It was the last thing to do in my waterproofing journey of the shower and prepping for the tile installation.
And here is where I learned a valuable lesson!
What is a shower drain flood test?
A drain flood test is a way to test for a shower drain leak. It ensures that your drain is sealed properly and reveals any issues with your drain before you tile your shower floor. You can also use it to test if you have a leaky shower pan by testing the waterproof ability of the pan you installed before you tile.
It provides a level of confidence that you don’t have a leaking drain and that you will be able to move forward in your project! In case you missed it, you can view which waterproofing method I chose for my shower and how I installed it.
Do you need to use a shower plug before installing the tile?
I 1000% recommend not skipping this step! Doing a flood test with a shower plug after installing a drain and before you tile is 100% worth the time and effort!
I took a different approach to this project than the last. Normally I would not have taken the time to do something like a flood test. I didn’t realize what an important step it would be in this basement bathroom finish until I had something go so terribly wrong.
I just had a weird feeling about it and decided that I better test the drain out for any leaks to be sure that there were no issues before installing all of the tile and the marble shower floor. And I am SO glad I did!
Cost of a test plug for a shower drain leak

You might laugh when I tell you what it cost to buy this plug. Something so simple saved me so much heartache later on!
I went to Lowe’s and bought a drain test plug, which is exactly what it sounds like. I bought a 2″ stopper at Lowe’s in the plumbing section that is designed for testing your drain for leaks.
The best $4 I have ever spent!
There are a few different sizes, so measure the diameter of your drain to be sure you buy one that fits. Or, like me, you will have to go back to Lowe’s and get the right size.

What happens to the water in a shower flood test?
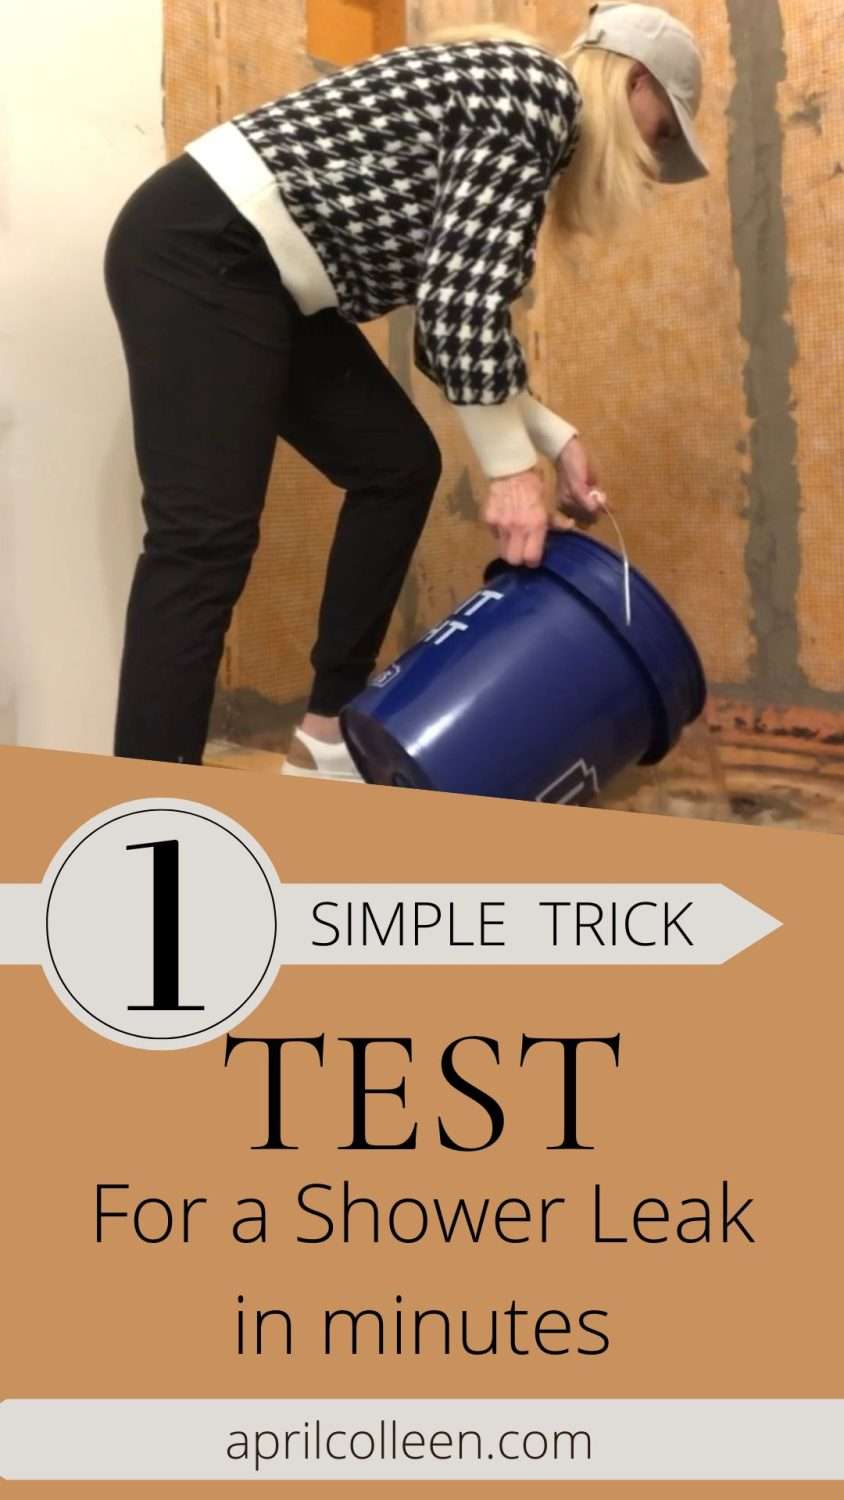
I inserted the shower test plug into my drain and tightened it down. Then I began my flood test.

I used a 5-gallon bucket and started to fill the shower bed with water. Since the plumbing wasn’t working in the basement yet, that meant multiple trips with huge, heavy full buckets of water from the main floor to the basement.

In a flood test, once the shower pan is full of water you make a line on your shower pan with a sharpie where the water line is so you can gauge if there has been any water loss over the hours you let it sit in there.
You are supposed to let it sit overnight and come back in the morning to see if the water line has moved, but I didn’t have to do that. As soon as I added water to the pan I noticed that it was swirling around and down the drain.
But it was plugged up so the water couldn’t be going down the drain!
So where was it going?
Where is my shower drain leaking from?
When I walked into the room adjacent to the bathroom there was water all over the floor and behind the wall! I am so glad that room was unfinished at the time. It is my future craft room and if it were finished it would have had water damage to my cabinets along that wall and water would have been seeping out from under the flooring. And I most likely would have needed to call in professional services and that would be costly.
And then I would have had a whole new mess to deal with!

In all honesty, I was so defeated and so deflated and I was really mad. I was at the point where I absolutely hated the project and wanted to wish it all away.
Thank goodness it wasn’t a pipe issue behind the wall and I didn’t have to tear it all out to replace anything! And I am really glad this was a basement shower and there was no damage to a ceiling below.
After digging in I figured out that the drain connection points weren’t properly connected and sealed. Such a simple thing caused such a big problem that I couldn’t believe it!
Sometimes DIY goes wrong and that is just part of it. There will always be something you didn’t expect in DIY and you learn to pivot quickly.
Steps to test for a shower drain leak in minutes
- Remove the drain cover if you have one on already
- Install and tighten a drain test plug into the drain
- Fill the shower pan with water almost to the top
- Mark where the water line is with a sharpie or tape (if your tile is already in)
- Leave it overnight, check the water level in the morning, and if it has not gone down your drain is not leaking
How I fixed a shower drain leak
I had to rip out the completed drain (which was mortared in the pan and all set) and search for the problem. I figured out what happened and came up with a solution for the repair.
I corrected it by adding more silicone to the connection points in the drain. It was really that simple. Then I put the drain back together. I had to step away from the project for the rest of the day.
It was devastating at the time, but nothing a nice glass of wine and a good night’s sleep couldn’t make better.
How did my second test for a shower drain leak go?
What came next? Another flood test. I went back up and down the stairs with huge buckets full of water and filled the shower pan with gallons of water. This time, as I was bringing in new buckets of water, I noticed it was staying in place and NOT swirling around the drain!
I filled the pan up with water almost to the top, marked my line where the water level was with a sharpie, held my breath, and ran around to the adjacent room in great anticipation.
No water on the floor! I ran back to the shower pan. Still, nothing swirling down the drain.
Now I had hope.
I left it overnight and came back in the morning to check. All of the water was still in the pan and still touching the sharpie line I had made. I was so happy I almost cried!
That meant that this part of the journey was behind me and I could get to the pretty stuff. Check out the simple design for this small bathroom.
How to prevent a leaking shower pan
I will tell you that preventing a leaking shower pan is all dependent on how you waterproof your shower. Since I used a kit and followed the directions, my installation was darn near perfect (except for the drain issue which was my fault) and I have had NO leaking from the shower pan.
The bathroom has been finished for a while now and there have been NO issues with water leaking into any of the adjacent rooms.
Choose your waterproof method carefully and do your research.
How to remove a shower drain cover to fix a leak
If I had finished the tile in the shower before doing my shower drain test, including all of the beautiful marble tiles on the shower floor, I would have needed to remove the grout, then the shower drain cover, and then all of the tile to figure out where my leak was coming from. That would have honestly been a nightmare!
In my case, the Schluter drain cover is square and simply screws on in four places so it would be easy to remove.
But if you have a basic, round cover, it is probably a snap-in shower drain cover and it is easy to remove! Just take some needle-nosed pliers, grab the cover in one of the holes near the center and pull straight up. It should come up easily!
Have you ever done a flood test or have you even heard about one until now? Ever had to fix a shower drain leak? Let me know in the comments. I would love to hear your experience!
Now I am onto the next steps in finishing this unfinished basement bathroom. What’s next? Installing tile.
The shower floor tile was a breeze to install. But the wall tiles were installed one by one. Any guesses on how many tiles this shower took? Check out the next post in this series for all the details!

Disclosure: This post may contain affiliate links, meaning I get a (very) small commission if you decide to make a purchase through my links, at no cost to you. As a Lowe’s Partner I earn from qualifying purchases. Thank you for your support!
Leave a Reply